Select the settings button/icon (cog symbol) in the GUI.
Under “How should OnionShare connect to Tor?” choose “Connect using socket file”, and set the socket file to /var/run/tor/control
Under “Tor authentication options” choose “No authentication, or cookie authentication”.
To test OnionShare is running correctly:
Click the “Test Tor Settings” button. If all steps were completed correctly, Tor will successfully connect.
The GUI should say it supports both ephemeral onion services and stealth onion services.
Figure:OnionShare Settings Window
Kicksecure Installation
3. Finalize configuration file settings.
When asked about Configuration file '/etc/machine-id', type:
y (yes) → Enter → install
Changed Configuration Files
First learn how to determine if the file comes from a Template:Project name package or other distribution like Debian. This is the list of Template:Project name-specific package name prefixes:
Does not come from Template:Project name: Press n as previously advised, otherwise settings affecting anonymity, privacy and security might be lost. This applies to the example above stating "Setting up ifupdown ...". Advanced users who know better could manually check the differences and merge them.
The company that hosts GnuPG (Intevation) does not maintain a secure TLS site for gpg4win. [6] To mitigate the threat from attackers using a man-in-the-middle attack to provide users with a forged version of GnuPG, Intevation offers a self-signed certificate. This certificate is itself secured by another certificate signed by GeoTrust; this certificate can be easily downloaded and imported.
Right-click Intevation-Root-CA-2016 file → Install Certificate → Right-click Open → "check" Local Machine → Right-click Next → "check" Automatically select the certificate store based on the type of certificate → Right-click Next → Right-click Finish.
If successful, the Certificate Import Wizard will show "The import was successful".
3. Click "OK" to exit.
Install YaCy
Security warning: Adding a third-party repository and/or installing third-party software allows the vendor to replace any software on your system, including but not limited to the installation of malware, file deletion, and data harvesting. Proceed at your own risk! See also Foreign Sources for further information. For greater safety, users adding third-party repositories should always use Multiple Whonix-Workstation™ to compartmentalize VMs with additional software.
Documentation in the Whonix wiki provides guidance on adding third-party software from various upstream repositories. This is especially useful since upstream often includes generic instructions for different Linux distributions, which may be complex for users to follow. Additionally, documentation in Whonix usually places a higher emphasis on security and verifying digital software signatures.
The instructions provided here serve as a "translation layer" from upstream documentation to Whonix, offering assistance in most scenarios. Nevertheless, it's important to recognize that upstream repositories and software may change over time. Consequently, the documentation on this wiki might require occasional updates, such as revised signing key fingerprints, to remain current and accurate.
Please note, this is a general wiki template and may not apply to all upstream documentation scenarios.
Users encountering issues, such as signing key problems, are advised to follow the Self Support First Policy and engage in Generic Bug Reproduction. This involves attempting to replicate the issue on Debian trixie, and contacting upstream directly if the issue can be reproduced, as such problems are likely unspecific to Whonix. In most cases, Whonix is not responsible for, nor capable of resolving, issues stemming from third-party software.
Should the user encounter bugs related to third-party software, it is advisable to report these issues to the respective upstream projects. Additionally, users are encouraged to share links to upstream bug reports in the Whonix forums and/or make edits to this wiki page. For example, if there are outdated links or key fingerprints that need updating, please feel free to make the necessary changes. Contributions aimed at maintaining the accuracy and currency of information are highly valued. These updates not only improve the quality of the wiki but also serve as a useful resource for other users.
In case more disk space is required for your virtual hard disk, the good news is that you are still a VirtualBox user. Template:Project name is nothing special; it is just another VM image. Any suggestions you find for VirtualBox will similarly work for Template:Project name.
This process is moderately difficult because there is no easy upstream solution (such as a GUI). Further, you have a VMDK disk instead of a VDI disk. [11] There is also no better (free, open source) virtualizer with this feature. However, most users can successfully complete this process and it is easier if Template:Project name is built from source. [12] In case you are using the download version, it is a bit more difficult.
Unfortunately, at the time of writing vboxmanage modifyhd <uuid|filename> --resize <size in mb> does not support VMDK images yet. The situation may have subsequently changed.
1. On the host: Make a clone of all states of your existing virtual machine in case something goes wrong.
2. On the host: Delete all existing snapshots.
3. On the host: Find the folder of your virtual hdd.
vboxmange list hdds4. On the host: Switch to that folder.
5. On the host: Convert from VMDK to VDI.
VBoxManage clonehd "[[:Template:Workstation product name short]]-disk1.vmdk" --format vdi "[[:Template:Workstation product name short]]-disk1.vdi"
6. Check the syntax.
VBoxManage modifyhd
7. On the host: Grow the disk.
VBoxManage modifyhd "[[:Template:Workstation product name short]]-disk1.vdi" --resize 100000
8. On the host: VirtualBox VM settings → mass storage.
Remove the old .vmdk, add the new .vdi.
9. Boot up and check if it is still working.
10. Up to this point only the physical size was increased, but the filesystem has not been changed. Shut down again.
11. Inside VM: You have to boot from a boot cd (Ubuntu Precise *DVD* did work) and use a tool like gparted to grow the filesystem.
Start a terminal.
lxsudo gparted
12. Inside VM: Increase the filesystem. Apply and shut down.
The procedure is complete.
Ethereum Wallet
UNFINISHED
UNFINISHED!
Connection Issues
Ethereum cannot be directly run over Tor yet since it requires UDP. This might change when geth 1.5 is released. [13]
gpg: assuming signed data in 'KeePassXC-2.3.4-x86_64.AppImage'
gpg: Signature made Thu 23 Aug 2018 01:31:30 PM EDT
gpg:                using RSA key C1E4CBA3AD78D3AFD894F9E0B7A66F03B59076A8
gpg: Good signature from "KeePassXC Release <release@keepassxc.org>" [unknown]
gpg: WARNING: This key is not certified with a trusted signature!
gpg:          There is no indication that the signature belongs to the owner.
Primary key fingerprint: BF5A 669F 2272 CF43 24C1  FDA8 CFB4 C216 6397 D0D2
     Subkey fingerprint: C1E4 CBA3 AD78 D3AF D894  F9E0 B7A6 6F03 B590 76A8
Make keepassxc executable.
chmod +x KeePassXC*
Automatically Prepend Tor Browser with Firejail
Starting with Template:Project name 14, users can automatically prepend the Tor Browser binary with Firejail. [15] This setting can be used in either the TemplateVM or TemplateBasedVM ([[Qubes-Whonix|Template:Q project name]]: anon-whonix).
If it still doesn't work, change the following setting: Virtual Box → Right-click on Template:Gateway product name → Settings → System → Acceleration → Uncheck the "Enable Nested Paging" Box → OK
Kernel Panic
Kernel panics are often caused by similar issues that result in the PAE crash and VERR_SSM_FIELD_NOT_CONSECUTIVE errors discussed above.
If possible, enable VT-x in BIOS settings.
If this option is unavailable, then disable PAE/NX in VirtualBox; see PAE crash above for instructions.
SecBrowser Qubes Stub
SecBrowser is a security-focused browser that provides vulnerability surface reduction for users that need high security, thereby reducing the risk of infection from malicious, arbitrary code. A built-in security slider provides enhanced usability, as website features which have historically been used as attack vectors (like JavaScript) can be easily disabled. Without any customization, SecBrowser’s default configuration offers better security than Firefox, Google Chrome or Microsoft Edge.[16] It also provides better protections from online tracking, fingerprinting and the linkability of activities across different websites.
SecBrowser is a derivative of the Tor Browser Bundle, but without Tor. This means unlike Tor Browser, SecBrowser does not route traffic over the Tor network. Even without the aid of the Tor network, SecBrowser still benefits from the numerous patches that Tor developers have merged into the code base. Even with developer skills, these enhancements would be arduous and time-consuming to duplicate in other browsers, with the outcome unlikely to match SecBrowser's many security benefits. While browser extensions can be installed to mitigate specific attack vectors, this ad hoc approach is insufficient. SecBrowser leverages the combines experience and knowledge of the Tor Project developers, Template:Project name developers and the battle-tested Tor Browser.
SecBrowser Security Enhancements
Features
Description
HTTPS Everywhere
This browser extension encrypts communications with many major websites, making your browsing more secure.[17]
NoScript
NoScript can provide significant protection with the correct configuration.[18] NoScript blocks active (executable) web content and protects against cross-site scripting (XSS). "The add-on also offers specific countermeasures against security exploits".
DNS and Proxy Configuration Obedience
Proxy obedience is achieved through custom patches, Firefox proxy settings, and build flags. Plugins which can bypass proxy setting are disabled.[19]
Reproducible Builds
Build security is achieved through a reproducible build process that enables anyone to produce byte-for-byte identical binaries to the ones the Tor Project releases.[20][21]
Slider Security
Enables improved security by disabling certain web features that can be used as attack vectors.[22][23]
WebRTC Disabled by Default
WebRTC can compromise the security of VPN tunnels, by exposing the external (real) IP address of a user.[24][25]
Settings
While SecBrowser has numerous security enhancements they can come at a cost of decreased usability. Since it is also highly configurable, security settings and behavior can be customized according to personal requirements.
Private Browsing Mode: In the default configuration Tor Browser has private browsing mode enabled. This setting prevents browsing and download history as well as cookies from remaining persistent across browser restarts. While private browsing mode increases security, usability can be affected to the point that some websites will not function properly or not at all.[26] To enhance usability SecBrowser comes packaged with a custom user_pref that disables private browsing mode. If privacy is paramount users can enable private browsing mode by commenting out the corresponding user preference.
Security Slider: By default the security slider is set to "Safest" which is the highest security setting.This will prevent some web pages from functioning properly, so security needs must be weighed against the degree of usability that is required.
Persistent NoScript Settings: SecBrowser includes a user_pref that allows custom NoScript settings to persist across browser sessions.This is a security vs usability trade-off.
Remember Logins and Passwords for Sites: To increase usability, users have the option to save site login information such as user names or passwords.
Privacy and Fingerprinting Resistance
Research from a pool of 500,000 Internet users has shown that the vast majority (84%) have unique browser configurations and version information which makes them trackable across the Internet. When Java or Flash is installed, this figures rises to 94%.[27] SecBrowser shares the fingerprint with around three million other Tor Browser users, which allows people who use SecBrowser to "blend in" with the larger population and better protect their privacy.
The EFF has found that while most browsers are uniquely fingerprintable, resistance is afforded via four methods:
Disabling JavaScript with tools like NoScript.
Use of Torbutton, which is bundled with SecBrowser and enabled by default.
Use of mobile devices like Android and iPhone.
Corporate desktop machines which are clones of one another.
With JavaScript disabled, SecBrowser provides significant resistance to browser fingerprinting.[28]
The User Agent is uniform for all Torbutton users.
Plugins are blocked.
The screen resolution is rounded down to 50 pixel multiples.
The timezone is set to GMT.
DOM Storage is cleared and disabled.
The EFF's Panopticlick fingerprint test shows that SecBrowser resists fingerprinting.
Note: Because tracking techniques are complex, Panopticlick does not measure all forms of tracking and protection.
SecBrowser conveys 6.26 bits of identifying information.
One in 76.46 browsers having the same fingerprint.
Browser's that convey lower bits of identification are better at resisting fingerprinting.[29]
When Tor Browser's and SecBrowser's HTTP headers are compared using Fingerprint central the test results are near identical.
Table:Tor Browser vs SecBrowser HTTP headers comparison.
Percentage (%) out of 1652 with fingerprints tags [Firefox,Windows]:
Name
Value
Tor Browser
SecBrowser
%
%
User-Agent
Mozilla/5.0 (Windows NT 6.1; rv:60.0) Gecko/20100101 Firefox/60.0
SecBrowser can be installed using tb-updater which is a package developed and maintained by Template:Project name developers. When run, tb-updater seamlessly automates the download and verification of SecBrowser (from The Tor Project's website). One of the many benefits of tb-updater is the ability to disable Tor is prebuilt into the software. This improves usability and is convenient since a security-focused browser (SecBrowser), is readily available. Unlike other manual methods of disabling Tor, this greatly simplifies the procedure and lessens the chance of a configuration error.
Conclusion
SecBrowser is a highly configurable security-focused browser that affords users with numerous options to fine tune their browser's security and usability. This can be achieved through user preferences (user_pref) or on the fly by means of an easy to use and intuitive security slider. This allows users to easily and seamlessly change their security posture to meet changing environments. SecBrowser's fingerprinting resistance provides strong protection against web tracking and can be combined with a VPN to further enhance privacy.[30] SecBrowser can be used with any Debian 10 (buster) based operating system including SecOS (a Hardened Debian based OS) which is in active development and coming soon.
These steps list the available git tags, and verifies the latest version and its commit (v2.0 at the time of writing).
Good signature messages should appear for each verify command below. Do not proceed if signatures are bad! In that case, remove the OnionShare directory and repeat step 3.
git tag
git verify-tag v2.0
git verify-commit v2.0^{commit}
[[Qubes-Whonix|Template:Q project name]] users should shut down anon-onionshare prior to the next step.
6. Install OnionShare dependencies.
Several dependencies must be installed in Template:Workstation product name (Template:Whonix-ws TemplateVM) for OnionShare to work correctly. Locate the BUILD.md file in the OnionShare repository and run the necessary apt-get commands in the "Debian-like distros" section.
For example, for OnionShare 2 run in a terminal (Konsole).
[[Qubes-Whonix|Template:Q project name]] users should shutdown the Template:Whonix-ws TemplateVM after dependencies have installed, and restart the anon-onionshare AppVM.
If you used the workaround mentioned in our previous blog post, don't forget to set the xpinstall.signatures.required entry in about:config back to true after installing this update.
If you used the workaround mentioned in our previous blog post, don't forget to set the xpinstall.signatures.required entry in about:config back to true after installing this update.
Repository Location URI
To set the default Template:Project name repository URI, choose one of the following.
Using onion sourcesmight provide protection against this vulnerability. [37] The special instructions below should be safe for Template:Project name users; minor modifications are necessary for Debian platforms. [38]
1. Move /etc/apt/sources.list.d/debian.list to a temporary location.
2) Go to the VirtualBox main window -> Right click a VM -> choose Settings -> Shared Folders -> click on the 'plus +' icon -> under 'Folder Path' choose a folder from your host OS -> in 'Folder Name:' type shared. Tick the Auto-mount checkbox. Press OK.
3) Power on the virtual machine.
4) Done. Files you drop into /mnt/shared in the virtual machine will end up in your host OS shared folder and vice versa.
Flash Leak Test SocksPort and TransPortFlash Leak Test both TransPort
Introduction
We explain the risks of browser plugins (flash etc.), discuss some alternatives and finally explain how to use browser plugins anyway in the best possible secure manner.
Tor Browser
For information about Tor Browser in general, see
Tor Browser.
Warning not to use them
Some popular plugins are non-Free, Closed Source software!
See Warning, Avoid non-Free Software.
Check if your browser plugin is Free Software before using it.
Quoted the Template:Project name Features page [46]: "Java / JavaScript / flash / browser plugins / Malware [47] / misconfigured applications cannot leak your real external IP." "This is still not recommended as they may decrease anonymity (e.g. flash cookies) and often have security vulnerabilities. Some popular plugins are closed source. See Template:Project name Security in real world."
Although it is not recommended, we don't want to withhold the knowledge from you how to use browser plugins.
The concern against browser plugins can be broken down to:
1. Non-Free Software. See our warning Box above.
2. Linkability: browser plugins use can be probably correlated to the same pseudonym. [49]
3. Fingerprinting: browser plugins can probably leak lots of information about your (virtual) operating system (Template:Workstation product name)
4. Security: some plugins have a history for remote exploits. More precise: the risk for your virtual operating system to get infected by trojan horses etc. is higher.
But anyway, of course you should look for alternatives first (see below), but if you insist on using browser plugins, an isolating/transparent proxy like Template:Project name is probably your best bet. [49]
Avoiding browser plugins
Avoiding browser plugins and flash is better than using them.
Note that there are alternatives to browser plugins. Most of the workarounds aren't a 100% complete, perfect drop in replacement, but perhaps it works sufficient for you (for example, if you only need youtube). Alternatives are html5, gnash, flash video replacer, flash video download or using a flash video download and convert online service. There are also applications worth checking, such as youtuberipper, ClipGrab, minitube, Totem with totem-plugins-extra, etc. Discussing the flash alternatives in details is beyond the scope of Template:Project name.
Also the Tails folks prepared a good list of Flash alternatives, see Tails Flash support.
If you still want to use browser plugins or flash, read below.
How to use Flash - EASY
Adobe Flash is non-Free, Closed Source software!
Make sure you have read our Warning not to use them above first!
If you insist on using browser plugins anyway (read warnings above), you can install new software [50] in Template:Workstation product name. Your best bet may be using the Tor Browser. JDownloader is a Libre alternative to Flash for downloading videos for local viewing.[51]
Your IP/location will still be hidden. Consider the plugin usage pseudonymous rather than anonymous. This is the EASY chapter, which does not include all security considerations. For those, read the whole page.
If you are using any plugins such as Flash, it will be probably known to the exit relay, exit relay's ISP and website, that you are a Template:Project name user.
(2) Additionally, it might make sense to install Firefox (Tor Browser) Add-On BetterPrivacy BetterPrivacy, which can be setup to delete Flash Cookies.
(3) Activate browser plugins in Tor Browser.
To activate browser plugins in Tor Browser [55] right click on Tor Button -> Preferences... -> Security Settings -> uncheck: Disable Plugins during Tor usage. You have to restart Tor Browser.
(4) Updating Flash
Each time there is a new version of flash, you should update.
Note that Tor Browser developers added a patch [56], which blocks all plugins except flash. To use other plugins, read the more advanced guide below.
How to use browser plugins - Advanced
If you don't like to use Tor Browser, you could install the mainstream Firefox, Chromium, Flash etc. For a discussion whether this is good or bad for anonymity, see the "More Security" section below.
It is recommended to activate only plugins, you really use. On most browsers their is a pseudo URL 'about:plugins' to check which are activated. Go to Tor Browser -> Tools -> Plugins and deactivate all plugins, which you don't need, or even better, uninstall them.
Using the easy instructions above will cause Tor Browser to go through SocksPort and browser plugins such as Flash to go through TransPort. It may or may not make sense to either force both through a SocksPort (difficult) or to force both through the TransPort, see footnotes.
Adobe Flash is non-Free, Closed Source software!
Make sure you have read our Warning not to use them above first!
If you insist on using it... For better security [59] or if Flash from the Debian repository does not work for you, Flash can be downloaded directly from Adobe.
An external application is needed to handle:

https://fpdownload.macromedia.com/get/flashplayer/pdc/11.2.202.270/install_flash_player_11_linux.i386.tar.gz

[...]
Verify, that you'll download from https.
(6) Download.
(7) Unpack.
(8) Follow the Installation instructions in the readme.txt.
Make a .desktop file for every DisposableVM shortcut that will be added to the menu.[61] These .desktop files must be placed in ~/.local/share/applications/.
Open a terminal in the DisposableVM Template.
dom0 → Qubes VM Manager → right-click on 'whonix-workstation-18-dvm' → click 'Run command in VM' → type 'konsole'[62]
Create a local applications directory.
mkdir -p ~/.local/share/applications/
Use a text editor to create and open each .desktop file and logically name each one.
As appropriate, add the following entries and substitute fields to each .desktop file. In the Exec field, substitute torbrowser with the command used to launch each relevant application matching the shortcut. For example: konsole, kwrite, libreoffice, kgpg, okular, dolphin and so on.
Icon= & Category= are also useful fields. Feel free to research the .desktop specification using the footnote above.
Once the .desktop files have been created, they need to be added to the Applications menu. Use a text editor to edit the following file.
kwrite ~/.config/menus/xfce-applications.menu
Find the menu entry associated with the DisposableVM Template. (Help!)
<Menu>
<Name>DisposableVMTemplate</Name>
In the <Include> subsection, add the appropriately named .desktop file.
<Filename>dvm-torbrowser.desktop</Filename>
Qubes 3.2 / XFCE4: MenuLibre (Untested)
This is recommended for testers only! Users should know how to fix the application menu in case it breaks. If interested, click on Expand on the right.
Warning: Testers have previously experienced removal of the Qubes System Tools start menu entry when applying these changes! For greater safety, consider using git to manage the home folder so any MenuLibre changes can be reverted.
Tor Browser presents a special situation because it is installed in a user's home directory. As a result, the TemplateVM (Template:Whonix-ws) never updates existing Tor Browser installations.
While editing entries, it is also possible to edit the xterm entry and change it to konsole. This is not important for security, but may be a personal preference.
R3.2 If you wish to install the alpha version of Tor Browser
Advanced users: If you wish to install the alpha version of Tor Browser, click on Expand on the right.
Option #1: Use a non-customized DisposableVM Template
This template will use a stock image based on whonix-ws and will not preserve any changes that are made to it.
Step 1: Disable tb-updater's functionality which automatically updates during apt-get inside the Qubes TemplateVM. [68]
This prevents the preferred Tor Browser version being overwritten by the stable version.
In whonix-ws terminal, run.
echo "tb_install_follow=false" | sudo tee -a /etc/torbrowser.d/50_user.conf
Step 2: Install the preferred version of Tor Browser to TemplateVM by launching Tor Browser Downloader by Template:Project name and following the instructions. [69][70][71]
Warning: Do not Use Firefox from Qubes' DisposableVM Default Start Menu
Do not expect anonymity when selecting Qubes Start Menu → DisposableVM → Firefox!
Using any browser other than Tor Browser is strongly discouraged if anonymity is desired, see Tor Browser. The default Qubes start menu option is best not used at all, unless the menu entry is manually edited to launch Tor Browser in place of Firefox. [72]
Qubes 3.1 / KDE4
dom0 → right-click Application Launcher Menu → click `Edit Applications` → Select DisposableVM from the VM entries on the left panel → Press the arrow button to expand the menu → Click New Item on the Toolbar → Type in a Name for the shortcut ->
Type in the specific command to launch the program in the DisposableVM. Tor Browser, konsole and dolphin are provided as examples below.
sh -c 'echo torbrowser | /usr/lib/qubes/qfile-daemon-dvm qubes.VMShell dom0 DEFAULT red'
sh -c 'echo konsole | /usr/lib/qubes/qfile-daemon-dvm qubes.VMShell dom0 DEFAULT red'
sh -c 'echo dolphin | /usr/lib/qubes/qfile-daemon-dvm qubes.VMShell dom0 DEFAULT red'
→ Click on the square in the upper right in order to choose an icon[73] → Click Save.
If the definition of the Template:Project name internal network fails because the network bridge "virbr1" already exists, edit the Whonix_network*.xml file and change the name to one that doesnt exist, e.g. "virbr2" (you can list all existing bridge adapters with "sudo brctl show").
On the host, a libvirt bug that conflicts with the way it works with Apparmor and the VM will refuse to start. It was fixed upstream but it will be a while until it reaches you.
Warning: Installing FoxyProxy worsens the user's browser fingerprint and adversely affects anonymity since it is not a default Tor Browser add-on. The Tor Project's anonymity warning is explicit: [74]
Can I install other Firefox extensions?
Tor Browser is free software, so there is nothing preventing you from modifying it any way you like. However, we do not recommend installing any additional Firefox add-ons with Tor Browser. Add-ons can break your anonymity in a number of ways, including browser fingerprinting and bypassing proxy settings.
When using a browser and FoxyProxy in combination, a user's web fingerprint becomes more unique. The potential fingerprinting harm to user anonymity depends on how many others are running Tor Browser in conjunction with FoxyProxy.
This configuration is so specialized that probably very few are doing it, reducing the user pool to a small subset. Due to the risk, this approach is generally recommended against. If a user decides to proceed anyhow, the tunnel configuration should not be combined with any browser other than Tor Browser (like Firefox or Chrome), due to an even greater browser fingerprinting risk.
This warning equally applies to configurations such as Tor Browser and I2P, or Tor Browser and remote (http(s)/socks4/5) proxies.
After restart, the FoxyProxy icon should appear in the Tor Browser toolbar and be enabled. Check you can interact with it and change proxy settings as required.
After FoxyProxy is installed, you may see an app-armory warning you about the denied creation of dconf/user. The current Debian profile for Firefox does not yet include the modern temporary file location /run/user. However, this can be safely ignored since FoxyProxy never needs access to this dconf/user. However, if you'd like give the Tor Browser permission to use tempory file directory /run/user/ and not receive the warning, edit the file
If [[Non-Qubes-Whonix|Template:Non q project name]] users did not take a snapshot prior to these changes, Tor Browser can be downloaded again. Alternatively, FoxyProxy can be removed via the about:addons → Extensions menu.
AnnealMail is a modified Enigmail implementation built around the Codecrypt PQ-crypto suite. Some interesting features include encrypted subject lines. Until it is packaged for Debian[80][81] it can be easily built from source.
1. Download the build dependencies and execute the commands[82] then install the resulting addon file from Thunderbird's extension tab.
2. Follow the instructions for setting up AnnealMail with Codecrypt[83]
Please note that Template:Project name developers cannot answer support requests related to Quicksilver. This possibility has just been pointed out and wasn't tested in practice. It is a whole different thing than Template:Project name and very technical, difficult with many stumble points. Please look for another way, if you need support. Setting up Nym is not Template:Project name specific. Success stories, use cases, comments, improved documentation etc. however is welcome.
grsecurity
About grsecurity
Linux kernel is not a secure OS, Linus himself made it pretty clear that he doesn't think highly of the "security community"[85]. His threat model and a Tor User threat model don't have much in common. Good that Linux is open source and if we disagree with a policy or politics we can just patch or fork it... Grsecurity/PaX is the most comprehensive kernel patch providing much needed security hardening both for the kernel itself and for making userland protections more effective.
Sadly Debian does not ship a grsecurity kernel. [86] That means either a packager/maintainer of Template:Project name needs to compile them EVERY TIME there is a security update to the kernel (which is pretty frequently) or the Template:Project name users themselves need to compile and update their kernels. This is undesirable because kernel compilation is not set and forget, you need a bit of knowledge, it takes a while, especially in a resource restricted VM and you need to keep updated about new releases via mailing lists or similar because your software updater doesn't automatically handle custom kernels (even emerge in hardened gentoo doesn't). All this would most likely only result in users running old, outdated kernel versions.
Furthermore, for Template:Gateway product name and the Identity/Location TCB grsecurity only addresses a subset of security risks: It can mitigate some kernel vulnerabilities (and we only really care about the networking stack which is pretty secure judging from its track record). Maybesome (memory corruption) vulnerabilities in apt-get and Tor that aren't already mitigated by the existing userland hardening done by Ubuntu. It can't protect against backdoors or security issues related to design, policy or yet unknown classes of exploits. We feel that these relatively small advantages outweigh the issues introduced by using a custom compiled kernel. We hope a binary distro will step forward and start using grsecurity. In that case we'll most likely switch Template:Gateway product name to that distro as soon as possible.
For Template:Workstation product name the benefits are even more doubtful. To be effective grsecurity needs to lock down some functions that are needed by Xorg, JIT compilers... but we need those to be working. To solve this we'd have to write a restrictive RBAC policy which is far from trivial. We think accepting that Template:Workstation product name will be exploitable and acting accordingly (using snapshots and rolling back to clean state) is the right approach for a desktop system.
If you disagree with this assessment or have any suggestions how to improve the current situation please let us know.
To speed up compilation, you might want to assign additional CPU cores and more RAM to your virtual machine.
Run grsecurity-installer to download kernel sources, grsecurity patch, compile and install the grsecurity kernel.
sudo bash -x grsecurity-installer
During make menuconfig you need to enable grsecurity.
TODO: expand
TorChat
HowTo
Installation
EXPERIMENTAL
Experimental in that it is difficult to install. Only use it in case you trust TorChat. There shouldn't be any anonymity leaks and it should be as safe as other onion services in general and in Template:Project name.
Learn about Onion Services in Template:Project name first and learn how to set up the hidden webserver. This will ease following this guide.
Qubes-Whonix™ note: The IP of Whonix-Workstation™ AppVM needs to be replaced with the actual IP address. To find out the IP address of the Qubes-Whonix™ Whonix-Workstation™ AppVM, the following command can be run within the Qubes-Whonix™ Whonix-Workstation™ AppVM.
qubesdb-read /qubes-ip
Do not use IP 10.152.152.11 because that only works with Non-Qubes-Whonix but not with Qubes-Whonix. The IP 10.152.152.11 in line starting with HiddenServicePort needs to be replaced.
Step 3: make changes to /usr/local/etc/torrc.d/50_user.conf take effect
Reload Tor.
After changing Tor configuration, Tor must be reloaded for changes to take effect.
Note: If Tor does not connect after completing all these steps, then a user mistake is the most likely explanation. Recheck /usr/local/etc/torrc.d/50_user.conf and repeat the steps outlined in the sections above. If Tor then connects successfully, all the necessary changes have been made.
If you are using Qubes-Whonix™, complete the following steps.
Qubes App Launcher (blue/grey "Q") → Service → Whonix-Gateway™ ProxyVM (commonly named 'sys-whonix') → Reload Tor
If you are using a graphical Whonix-Gateway, complete the following steps.
Start Menu → System Tools → Reload Tor
If you are using a terminal Whonix-Gateway, click
HERE for instructions.
Complete the following steps.
Reload Tor.
sudo systemctl reload tor@default.service
Check Tor's daemon status.
sudo systemctl status tor@default.service
It should include a a message saying.
Active: active (running) since ...
In case of issues, try the following debugging steps.
Reminder: Always backup the onion service key. This is necessary in order to restore it on another machine, on a newer Whonix-Gateway™, after HDD/SSD failure, etc. Follow the instructions below to find its location; root permission is required to access it.
The following example shows how to copy the /var/lib/tor/torchat/private_key from the sys-whonix VM to the vault VM (which should be started beforehand) using qvm-copy. A dialog will appear asking for the destination VM.
sudo qvm-copy /var/lib/tor/torchat/private_key
When the dialog appears asking to confirm, select vault. This copies the Tor onion service private key file to the QubesIncoming folder of the vault VM.
Consider moving the file from the QubesIncoming folder to another preferred location.
Qubes VM Manager can be used to conveniently backup the vault and/or other VMs. Please refer to the Qubes backups documentation for necessary steps to accomplish that.
Open the torchat.ini which is in the hidden folder /home/user/.torchat/torchat.ini. The folder ~/.torchat/Tor can be ignored.
kwrite /home/user/.torchat/torchat.ini
Look for the following line.
own_hostname = <your onion hostname without the .onion ending>
Replace it with your onion hostname. For example if your onion hostname is idnxcnkne4qt76tg.onion replace it enter idnxcnkne4qt76tg, so it looks like this:
own_hostname = idnxcnkne4qt76tg
Save.
Step 3: Qubers users only
Qubes-Whonix™ users who require an additional firewall exception, please press Expand on the right.
Note: Non-Qubes-Whonix users can skip this step.
Open firewall port access for the application between Whonix-Gateway™ and Whonix-Workstation™.
After changing Tor configuration, Tor must be reloaded for changes to take effect.
Note: If Tor does not connect after completing all these steps, then a user mistake is the most likely explanation. Recheck /usr/local/etc/torrc.d/50_user.conf and repeat the steps outlined in the sections above. If Tor then connects successfully, all the necessary changes have been made.
If you are using Qubes-Whonix™, complete the following steps.
Qubes App Launcher (blue/grey "Q") → Service → Whonix-Gateway™ ProxyVM (commonly named 'sys-whonix') → Reload Tor
If you are using a graphical Whonix-Gateway, complete the following steps.
Start Menu → System Tools → Reload Tor
If you are using a terminal Whonix-Gateway, click
HERE for instructions.
Complete the following steps.
Reload Tor.
sudo systemctl reload tor@default.service
Check Tor's daemon status.
sudo systemctl status tor@default.service
It should include a a message saying.
Active: active (running) since ...
In case of issues, try the following debugging steps.
--2013-02-13 13:49:47--  http://10.152.152.10:9119/
Connecting to 10.152.152.10:9119... connected.
HTTP request sent, awaiting response... 501 Tor is not an HTTP Proxy
2013-02-13 13:49:47 ERROR 501: Tor is not an HTTP Proxy.
It means, it is fine and the port is reachable.
Run torchat in a Terminal.
torchat
The following output is an example, how it looks when everything is fine.
~ $ torchat
(0) [config,470,main] python version 2.7.3 (default, Jan  2 2013, 16:53:07) [GCC 4.7.2]
(0) [config,477,main] script directory is /usr/share/torchat
(0) [config,478,main] data directory is /home/user/.torchat
./tor.sh: 6: ./tor.sh: tor: not found
(0) [tc_client,2083,startPortableTor] very strange: portable tor started but hostname could not be read
(0) [tc_client,2084,startPortableTor] will use section [tor] and not [tor_portable]
OnionCat transports any protocol between endpoints inside the Tor network. All involved peers need to run OnionCat. It gives IPv6 addresses to Onion Services, making many applications possible.
After changing Tor configuration, Tor must be reloaded for changes to take effect.
Note: If Tor does not connect after completing all these steps, then a user mistake is the most likely explanation. Recheck /usr/local/etc/torrc.d/50_user.conf and repeat the steps outlined in the sections above. If Tor then connects successfully, all the necessary changes have been made.
If you are using Qubes-Whonix™, complete the following steps.
Qubes App Launcher (blue/grey "Q") → Service → Whonix-Gateway™ ProxyVM (commonly named 'sys-whonix') → Reload Tor
If you are using a graphical Whonix-Gateway, complete the following steps.
Start Menu → System Tools → Reload Tor
If you are using a terminal Whonix-Gateway, click
HERE for instructions.
Complete the following steps.
Reload Tor.
sudo systemctl reload tor@default.service
Check Tor's daemon status.
sudo systemctl status tor@default.service
It should include a a message saying.
Active: active (running) since ...
In case of issues, try the following debugging steps.
Reminder: Always backup the onion service key. This is necessary in order to restore it on another machine, on a newer Whonix-Gateway™, after HDD/SSD failure, etc. Follow the instructions below to find its location; root permission is required to access it.
The following example shows how to copy the /var/lib/tor/onionchat/private_key from the sys-whonix VM to the vault VM (which should be started beforehand) using qvm-copy. A dialog will appear asking for the destination VM.
sudo qvm-copy /var/lib/tor/onionchat/private_key
When the dialog appears asking to confirm, select vault. This copies the Tor onion service private key file to the QubesIncoming folder of the vault VM.
Consider moving the file from the QubesIncoming folder to another preferred location.
Qubes VM Manager can be used to conveniently backup the vault and/or other VMs. Please refer to the Qubes backups documentation for necessary steps to accomplish that.
Start onioncat. Replace address.onion with your actual onion service url from above.
sudo ocat address.onion -l 10.152.152.11:8060
As of onioncat r555 (only applies to Jessie onwards) onioncat starts in unidirection 'client' mode by default. To accept incoming connections -U must be used. Mutual authentication is also available in this newer version which is needed to ensure that the identities of all endpoints engaged in a transaction are verified. [89]
sudo ocat address.onion -U -l 10.152.152.11:8060
Alternatively, if starting onioncat in 'client' mode run:
sudo ocat -R
At least one node has to run as a 'server' with a Hidden service configured for contact to occur.
To enumerate your onioncat IPv6 address run:
sudo ocat -i address.onion
Notes
Security
There are two possible ways to authenticate and control who is allowed to connect to you Onioncat instance and the applications running on top of it.
1. The simpler and more robust approach is to setup Tor to perform authentication of clients connecting to your Onion Service. If they do not possess a certain randomly generated cryptographic secret, they cannot connect to your Onion Service.
2. The second approach does this process at the higher level through delegating authentication to Onioncat.
For official documentation on security read the reference at the end of this sentence. [90]
Onioncat Authentication Notes and Definitions:
Bi-directional mode is what was used for OC since the beginning. That means that one established circuit (TCP session through Tor) is being used to send AND transmit packets. Thus, it is called bi-directional.
Uni-directional mode means that there are two separate circuits: one for sending and one for receiving.
So what's the implications:
Circuits are established through Tor and are identified and authenticated by the network through the onion hostname (= OC IPv6 address). But this
authentication is just one-ended. That means that the client (the one initiating the circuit) can authenticate the server but the server can't
authenticate the client. As a consequence the client could spoof its IP address. In Tor/OnionCat context, IP spoofing means to use any IPv6 address
but not the one which is associated to the onion ID (that's actually what -R does). Although this is technically no problem there's a security risk which
could be that someone takes over the IPv6 address from someone else and could thereby attract (steal) packets. The risk is still very low.
Uni-directional mode addresses exactly that problem. It forces the server to not reuse an incoming connection but establish a new circuit to the supposed client. Thus spoofing is defeated because it requires for the client to own the private key as well.
Uni-directional mode is on by default since revision 556, but this change may be subject to change in future releases.
Uni-directional mode and -R (i.e. starting onioncat in 'client' mode) are incompatible! That means an OnionCat using -R will not be able to communicate with an OnionCat in uni-directional mode.
OnionCats with -R can only talk to bi-directional OnionCats having -U set as noted above.
Source / Credits of this chapter:
These are Onioncat dev, Bernhard Fischer's words with modifications by the Template:Project name team. All credit goes to him.
Tunneling IPv4
Many programs do not support IPv6 and so to use IPv4 with Onioncat, IPv4 will need to be tunneled over IPv6.[91] This option is preferred to Onioncat's native IPv4 forwarding designated by the -4 parameter, which is deprecated and could not have guaranteed the authenticity of the communicating endpoints as the tunneling method can.
Most operating systems should support IP-IP6 tunneling. IPv6 supports encapsulation of IPv4 or IPv6, hence, tunneling is not a big deal. An IP-IP6 tunnel is a point-to-point tunnel between two IPv6 nodes. The tunnel endpoints are virtual network interfaces. IP addresses are assigned to them and routing has to be set up as usual (as if those interfaces where ethernets). Before configuring a tunnel you need to know the two IPv6 addresses of the IPv6 nodes. Those will be the IPv6 OnionCat addresses. There are a few steps necessary on Linux. First insert the IPv6 tunneling kernel module, then setup the tunnel interface by connecting it to the two IPv6 addresses. Next configure the IPv4 addresses to the tunnel endpoints, bring them up and add the necessary routes (... and don't forget to update your firewall rules - but this is not needed with Template:Project name Workstation's default settings).
sudo su
modprobe ip6_tunnel
ip -6 tunnel add iptun0 mode ipip6 local fd87:d87e:eb43:1f53:c75:3b27:7adc:c9a5 remote fd87:d87e:eb43:8733:3338:21f6:a2b8:eebf
ifconfig iptun0 192.168.100.1 up
route add -net 192.168.100.0/24 dev iptun0
On the other end do the same thing except that you have to swap the two IPv6 addresses and use another IP address on the tunnel endpoint, e.g. 192.168.100.2. If Tor, OnionCat, and the tunnel is up on both ends you should be able to ping the remote end.
Useful Commands
Check connectivity between endpoints using ping:
ping6 onioncat-address
Replies should come immediately if everything is working.
To derive the OnionCat IPv6 address from your Onion Service address run:
ocat -i onion.address
Running ifconfig can show helpful information on active network interfaces:
To make Onioncat to autostart with the system using the parameters listed above.
editing its configuration file:
sudoedit /etc/default/onioncat
Enable the autostart comment by removing '#':
ENABLED=yes
Add your settings:
DAEMON_OPTS="Paramters go here"
Over I2P
GarliCat over I2P might only work, if you use ip2 over Tor.
There was the idea to create an I2PBOX, but it never came to live due to lack of community interest, which means GarliCat directly over I2P will not be supported by Template:Project name.
There at multiple sources for issues, you might stumble upon.
Therefore it is recommended, before you try using OnionCat with Template:Project name, if that doesn't endanger you, try first to successfully test OnionCat without Template:Project name.
As soon as you learnt that, it eliminated one source for possible issues (OnionCat) and can start learning how to use it with Template:Project name (which might introduce new issues, but enhanced security will be your reward).
We believe security software like Whonix needs to remain Open Source and independent. Would you help sustain and grow the project? Learn more about our 14 year success story and maybe DONATE!
Tor Access
These instructions break sending emails to other domains that are not riseup.
Some email services provide access via Onion Service addresses. This provides better end to end security properties for authenticating to the server and conceals when you check your inbox.
In Thunderbird go to:
Settings -> Preferences -> Account Settings
Server Settings Tab, set the IMAP address to:
imap.<address>.onion
Outgoing Server (SMTP) Tab, Edit:
smtp.<address>.onion
The service providers may or may not enable TLS/STARTTLS connection security for their Onion domain since it is redundant. Its best to leave turned on by default and only disable it if problems arise.
Leave your Default Identity with the clearnet domain to avoid confusing recipients when replying to you.
Pidgin
For instant messaging in Template:Project name you can install the Pidgin[92] Instant Messenger. It is a multi-protocol client, so you could run MSN, ICQ, IRC, AIM, XMPP/Jabber and many other protocols at the same time, even with several instances of the same protocol.
All of these chat systems are unsafe if not used together with OTR. Even when used with OTR, expect to be exposing your social graph. Privacy hackers isolate parts of the social graph by running several accounts for groups of people on each popular server, thus avoiding the insecure XMPP federation (adding people on servers that is not your own).
You can install it using Start menu -> Applications -> System -> Terminal.
sudo apt-get updatesudo apt-get install pidgin
There is also a Torchat plugin available for pidgin official libpurple-torchat pidgin plugin, which could be implemented to allow p2p encrypted end-to-end communications although there is no known documentation on getting this done specifically in Template:Project name. It works seamless on standard pidgin/linux distro's with tor, the code is over a year without any changes/updates, hopefully because it simply works without any need for changes.
Some protocols that are problematic in context of privacy/anonymity are disabled by default. [93]
After a restart of Pidgin, the protocols will be available.
OTR encryption
Of course the issue of end-to-end encryption arises again. As we mentioned earlier, we have Off-the-record messaging[94] (commonly called OTR) for instant messaging, and Pidgin and many other instant messengers have support for that. There are several resources on how it works and how to use it on their web site. Basically all you need to do is choose "Start private conversation" in the OTR menu and a key will be generated automatically if you do not have one already. After that OTR will establish a private conversation if the other end's instant messenger supports it.
If you didn't authenticate your partner with something like a shared secret there can be a man in the middle recording your chat, even if you are using the same server (the server or the TLS connection to the server may be corrupted).
OTR and other Pidgin plugins are enabled in the "Tools menu -> Plug-ins" section. Simply check the appropriate box for enabling any plugin you want, and possibly you might also want to configure it by pressing the "Configure Plug-in" button. When this is done for the OTR plugin a window that can be used to manage your keys will open. The use of OTR is recommended as many instant messaging protocols normally sends your messages in plaintext. Force your friends to migrate to clients with support for OTR!
NOTE: /me is not encrypted when used in a OTR private conversation! Also /msg in XMPP chatrooms is not – it goes through the chatroom server!
Jacob Appelbaum (Tor researcher) recommends[95] Jitsi[96] (this applies if _not_ using Tor). It supports OTR encryption and ZRTP and is available in Debian Testing.
Jitsi supports push to talk.
Jitsi is the most feature-rich Free Software VoIP client. The team behind it is very innovative, constantly focusing on adding new functionality. It supports many protocols and advanced features like Multi-party video conferencing - in which someone's client will be running into server mode for that purpose because of latency management.[97]
Its stability leaves more to be desired however. Alpha stage clients are available for Android.
Unfortunately it is not usable with Tor, because the Tor network does not support UDP and because Jitsi does not support TCP for audio/video at time of writing (April 2014).
TODO: write a guide on how to connect to a free public server, having a secure ZRTP encrypted conversation with someone using the same client (note: impossible as of April 2014 without revealing the ip numbers of the corresponding parties to both eavesdroppers and the server).
sflphone
Nathan Freitas (Tor Orbot developer) likes[98] sflphone[99]. Can be installed from Debian package sources.
It does not support OTR. You would have to keep that in mind and use another way to exchange encrypted text. This is not a reason, not to use it, if you are aware of that.
TODO: research, does sflphone support push to talk?
TODO: write a guide how to connect to a free public server, having a secure ZRTP encrypted conversation with someone using the same client.
OnionPhone
OnionPhone [100] is the successor to TOR Fone, improving the ciphers used among other problems[101]. Repo here [102]
The main improvement is that OnionPhone can now be used as a VoIP plugin that integrates it with with TorChat, using the Tor network to protect and anonymize your communication in this mode. It is also the only mode that makes sense in terns of usability because otherwise its a command line utility.
OnionPhone works on Linux and Windows, with Android support planned.
Other modes of operation include using the Tor network as a decentralized and secure alternative for SIP signalling. The call streams are then initiated directly using either TCP or UDP (for NAT traversal). Note that metadata is not concealed in that mode.
It can be run standalone with direct connections with OnionCat.
TODO: Encourage Debian Packaging
TODO: Build, test and document usage instructions with TorChat
linphone
Introduction
Linphone is one of the most feature-rich Free Software clients available, second only to Jitsi in that respect, but second to none is stability and performance from testing. It can also support conferencing (audio only as of 2014).[103] Additionally it has fully developed clients for all desktop and mobile operating systems.
Should an Android port of Onioncat ever become a reality by the Guardian Project, Linphone can be used for anonymous VoIP between all combinations of device form factors. There is headway on that front.[104]
Technically, only one member of the chat party needs to configure a Tor Onion Service (be a callee). Others can run Onioncat in 'client' only mode (be ca caller).
Bidirectional communication can only be established after the client party (caller) connects to the one running an onion service 'server' mode (callee), because the latter can accept incoming connections while the former cannot.
callee
caller
Can make outgoing calls
Yes
Yes
Can initially receive incoming calls
Yes
No
Needs to host a Tor onion service
Yes
No
Difficulty setup
medium
easy
Setup as Both, Callee or Caller
You only have to read this, if you want to use linphone as both, callee or caller. As a caller, you can only make outgoing calls. As a callee (that includes ability of being a caller), you can make outgoing calls and receive incoming calls. Only one of both calling parters has to follow these instructions. However, it doesn't matter if both calling partners follow these following instructions.
If you are interested, click on Expand on the right.
Reminder: Backup your onion service key, in case you want to be able to restore it, on another machine, on a newer Template:Gateway product name, after hdd failure, etc. You can find it here and need sudo to access it.
As of onioncat r555 (only applies to Jessie onwards) onioncat starts in unidirection 'client' mode by default. To accept incoming connections -U must be used. Mutual authentication is also available in this newer version which is needed to ensure that the identities of all endpoints engaged in a transaction are verified. [106]
Find out your onioncat IPv6 address.
ip addr show dev tun0
Open Linphone settings and select IPv6. Apply and restart Linphone.
Setup only as Caller
You only have to read this, if you want to use linphone caller only. As a caller, you can only make outgoing calls. Only one of both calling parters can follow these instructions. If both calling partners would follow these instructions, would not be able to call each other.
If you are interested, click on Expand on the right.
At this point you should have exchanged IPv6 addresses of the callee. To call someone put in the call box. You can keep user. Must use brackets. Replace onioncat IPv6 address with the actual IPv6 of your calling partner.
To make Onioncat to autostart with the system using the parameters listed above.
editing its configuration file:
sudoedit /etc/default/onioncat
Enable the autostart comment by removing '#':
ENABLED=yes
Add your settings:
DAEMON_OPTS="Paramters go here"
Credits
Credits go to HulaHoop for researching how to use Linphone with Tor for sharing instructions in Template:Project name User Forum.
Development Ideas
OnionCat
OnionCat could be useful if tunneling UDP and/or ICMP tunneling over Tor should be required. It should be avoided if possible, because it add complexity to the setup. Does it introduce more latency because connection always goes from onion service to onion service?
OpenBazaar
OpenBazaar supports both TCP and UDP. The latter was added to aid those using it on the clearnet that had difficulties connecting from behind their routers. [107] When using Tor you don't have to worry about that.
A community demo for OpenBazaar was done with Tor by hosting seed nodes as Onion Services.
Hosting ANY Onion Services
You can provide any server service, which relies on TCP, such as web servers, IRC servers, chat servers and so forth. UDP and IPv6 are not supported by the Tor network, but if required you could use OnionCat as a workaround.
Syncthing is a libre software solution for private file synchronization.
This section will cover file syncing with peers inside the Tor network.
TO-DO: Test Syncthing without OnionCat since SOCKS support was added recently.[111]
1. Set up OnionCat on Template:Project name Gateway. All parties involved will need to configure a Onion Service with OnionCat because syncing is bidirectional. Make sure you can successfully ping all OnionCat addresses before proceeding.
Security warning: Adding a third-party repository and/or installing third-party software allows the vendor to replace any software on your system, including but not limited to the installation of malware, file deletion, and data harvesting. Proceed at your own risk! See also Foreign Sources for further information. For greater safety, users adding third-party repositories should always use Multiple Whonix-Workstation™ to compartmentalize VMs with additional software.
Documentation in the Whonix wiki provides guidance on adding third-party software from various upstream repositories. This is especially useful since upstream often includes generic instructions for different Linux distributions, which may be complex for users to follow. Additionally, documentation in Whonix usually places a higher emphasis on security and verifying digital software signatures.
The instructions provided here serve as a "translation layer" from upstream documentation to Whonix, offering assistance in most scenarios. Nevertheless, it's important to recognize that upstream repositories and software may change over time. Consequently, the documentation on this wiki might require occasional updates, such as revised signing key fingerprints, to remain current and accurate.
Please note, this is a general wiki template and may not apply to all upstream documentation scenarios.
Users encountering issues, such as signing key problems, are advised to follow the Self Support First Policy and engage in Generic Bug Reproduction. This involves attempting to replicate the issue on Debian trixie, and contacting upstream directly if the issue can be reproduced, as such problems are likely unspecific to Whonix. In most cases, Whonix is not responsible for, nor capable of resolving, issues stemming from third-party software.
Should the user encounter bugs related to third-party software, it is advisable to report these issues to the respective upstream projects. Additionally, users are encouraged to share links to upstream bug reports in the Whonix forums and/or make edits to this wiki page. For example, if there are outdated links or key fingerprints that need updating, please feel free to make the necessary changes. Contributions aimed at maintaining the accuracy and currency of information are highly valued. These updates not only improve the quality of the wiki but also serve as a useful resource for other users.
To open the WebGUI, open Tor Browser and paste:
http://127.0.0.1:8384/
4. At this point Syncthing back-end should have generated your unique Device ID.
Go to:
Actions > Show ID
Share the Device ID along with your OnionCat address. As long as one side shares this information the other can add and find them.
5. Once ID information is exchanged, go to
Add Device
and paste the other endpoint's Device ID. Then under Addresses change dynamic to
[OnionCat-address]:22000
Note that you MUST write the OnionCat IPv6 address within brackets for it to work.
Select the default directory under Share Folders With Device.
6. Syncing more than two endpoints can quickly become tedious so select at least one node to be an Introducer by selecting the option. The Introducer node will inform the new device about all nodes attached to it.
7. Finally drag and drop any files you want to sync to the 'Sync' folder under your Home directory.
Done.
Note: No one can connect to your swarm without you adding them but you may still want to make your virtual network more private. This is done using HiddenServiceAuthorizeClient - a Tor feature.
Torrenting over OnionCat
This section will cover torrenting with anonymous peers inside the Tor network. This is a trackerless setup.
Seeding
1. Set up OnionCat on Template:Project name Gateway. All parties involved will need to configure a Onion Service with OnionCat because torrenting is bidirectional.
2. Next install qBittorrent:
sudo apt-get install qbittorrent
3. Create your torrent:
Tools > Torrent creator
Add the file/folder you want to share. Leave the Tracker information boxes empty. Insert your OnionCat IPv6 IP into the Comment section.
Check Start seeding after creation then create and save the torrent file.
4. Share the torrent file on your personal Onion Site blog or some other channel as you normally would.
Downloading
1. Add the torrent file in qBittorrent
2. Select the the torrent from the list and go to the General tab. Copy the OnionCat IPv6 address from the Comment section.
3. Click the Peers tab and right-click into the empty tab. Click Add a new peer... and paste the IPv6 address. Note that the default listening port for incoming connections is set to 6881 and nothing needs to be done.
Done.
For a private sharing environment you will need to configure Tor to use the HiddenServiceAuthorizeClient option. More on that here.
Tunnel Freenet over OnionCat
Some Freenet users have successfully experimented with connecting over OnionCat. Note that all communicating parties need to set this up for this to work. Follow this guide to connect to other Darknet peers. No connections to the public datastore possible with this method.[114]
Adjust OnionCat to connect to the Gateway with socat.
TO-DO: Create and add socat template to all relevant onion service guides
Pond
Removed because upstream dead.
Pond is a forward secure, asynchronous messaging system that uses Tor to conceal metadata. Pond messages not a record; they expire automatically a week after they are received.
cd
mkdir gopkg
export GOPATH=$HOME/gopkg
$GOPATH/usr/bin/pond-client
The server's file path:
/usr/bin/pond-server
Optionally set a passphrase and keep the default server selected.
For usage instructions read help --all to understand the options.
HugePages
Huge memory pages improve performance for some virtualized workloads such as running databases.
They are not enabled by default in Linux because the amount of memory to be allocated this way depends on the different needs from one user/admin to another. [115]
On the host you need to activate the nr_hugepages setting in the proc filesystem:
echo 1054 > /proc/sys/vm/nr_hugepages
NOTE: To make the above value persistent, you'd need to set:
The security assumptions about virtual environments is that each vm is a completely isolated instance that knows nothing about what's happening outside it. It posses a privacy problem for an isolated multi-workstation setup.
In a single workstation-to-gateway scenario, KSM is not problematic because technically, nothing going on, on the gateway, even if known would endanger privacy. However should someone run multiple workstation vms, each with the intent that they are all separated - each with its own internal network for isolation for example, then with KSM all similar activities or processes running in the other vms, would register to an attacker who has compromised one of them. For example, information that the same website has been visited in another vm too. This would allow cross-vm activity correlation.
Its not really a weakness unique to KSM, but a common problem shared by using the equivalent feature on other hypervisors too (Xen's TPS - Transparent Page Sharing). [117]
The memory disclosure attack can also be applied to find an opened file on a victim’s VM. We have tried to detect a logo file when Firefox shows a home page.
We confirmed that the Google logo file was detected if page caching is enabled on Firefox. When the page cache was set to 0, detection failed. If an attacker leads a victim to a malicious home page which includes an identifiable logo file, the attacker can detect the page view from the victim’s VM.
This disclosure attack is dangerous because it detects a page view even if the network is encrypted by TLS/SSL. Especially in a multi-tenant data center, this attack is serious, because it does not violate any SLA statements on cloud computing.
Wiping the storage used by a guest domain
A volume used by a domain can contain confidential data, hence it is necessary to wipe it before removal. Libvirt offers a helping hand for such cases:
virsh vol-wipe <volume>
which truncates and extends the volume to its original size. This in fact fills the file with zeroes. This ensures that data previously stored on volume is not accessible to reads anymore. After this, you can remove volume :
SELinux is more robust than Apparmor because its label based vs file-path based. But his comes at the expense of being difficult to write policies. The good news is if you are a KVM user and want to harden your GNU/Linux host, its as simple as enabling SELinux and libvirt will automatically take advantage of it without any further effort needed on your part.
These instructions apply to Template:Project name and could be easily replicated for your Debian host.
First disable Apparmor if you are using it. Both MAC systems cannot be run simultaneously run. This is not supported by LSM and may also be a source of conflicts.
AppArmor is disabled, and the kernel module unloaded by entering the following[120]:
To enable SELinux follow these steps.[121] The cited guide also includes steps for writing custom policy for hardening.
    # aptitude install selinux-basics selinux-policy-default
    # selinux-activate
    # reboot

    # sudoedit /etc/default/grub

    Replace all mention of apparmor in settings for GRUB_CMDLINE_LINUX with selinux=1 and the enforcing=1 parameter to the Linux kernel. The audit=1 parameter enables SELinux logging which records all the denied operations.

    Remove the line under it that starts with: GRUB_CMDLINE_LINUX_DEFAULT

    # update-grub
(If they fail for the first time, perhaps because you are on a slow network or slow Tor circuit, run them a few times until the succeed.)
,, Technical problem: The latest Template:Project name release is a few days ago and in meanwhile there is a new deb.torproject.org-keyring got renewed while the old torproject deb keys expired. Fixing the problem requires a new Template:Project name release. It will be fixed in 0.3.0.
Nymserver QuickSilver Mail How-To
This guide is for QuickSilver Lite, a Freedom Software GUI for Mixmaster. QuickSilver Lite was written for Windows but is fully compatible with Wine. The paranoici Zax-type Nymserver is used for this example. Credit goes to Template:Project name user mirimir whose instructions this work is based on.[122][123]
## Generate your GPG keypair using KGpg. Fill in the nym you chose for the Email field. Use something likely not taken:
KGpg -> Keys -> Generate Key Pair... ->

Name: John Doe (or any alias of choice)
Email: yournym@nymphet.paranoici.org
Keysize: 4096 bits

OK -> Enter passphrase for key -> OK.


## Import Nymserver key from KGpg.
KGpg -> Open Keyserver Dialog -> Search for 'send@nymphet.paranoici.org' -> Import


## Always check the fingerprint for yourself. The output at the moment is:

pub  4096R/0x5CE8D7B97340F3A7 2013-01-06 Nymserver <send@nymphet.paranoici.org>
      Key fingerprint = B91A FAEE 998D 5134 5AFE  E104 5CE8 D7B9 7340 F3A7


## In KGpg, highlight your key, and set Trust level on Nymserver key to 'Marginal' and sign it with your own key.

Right-click on Nymserver key -> Key Properties

Owner Trust: Marginally

-> Apply -> OK


Right-click on Nymserver key -> Continue -> Select your nym's secret key to use for signing -> OK -> Enter passphrase


## Download QuickSilver's signing keys with scurl to home folder.
scurl -ko quicksilver.asc https://www.quicksilvermail.net/quicksilver.asc

## Check fingerprints/owners without importing anything.
gpg --keyid-format long --with-fingerprint quicksilver.asc

## Always check the fingerprint for yourself. The output at the moment is:

pub  4096R/0x1B04C05145FF11B1 2013-09-08 QuickSilver <admin@quicksilvermail.net>
      Key fingerprint = 6BC3 5E3D 7473 E416 F423  E845 1B04 C051 45FF 11B1

## Import key:
gpg --import quicksilver.asc

## To avoid ''unsafe ownership'' key warnings
gpg --fingerprint
chmod --recursive 700 ~/.gnupg


## Download archives.
wget -r --no-check-certificate --no-parent -A 'QSLite*.zip' https://www.quicksilvermail.net/qslite/
wget -r --no-check-certificate --no-parent -A 'QSLite*.zip.sig' https://www.quicksilvermail.net/qslite/
wget -r --no-check-certificate --no-parent -A 'QSAam*.zip' https://www.quicksilvermail.net/qsaam/
wget -r --no-check-certificate --no-parent -A 'QSAam*.zip.sig' https://www.quicksilvermail.net/qsaam/


## Move files into Home folder.
mv /home/user/www.quicksilvermail.net/qslite/QSLite*.zip /home/user
mv /home/user/www.quicksilvermail.net/qslite/QSLite*.zip.sig /home/user
mv /home/user/www.quicksilvermail.net/qsaam/QSAam*.zip /home/user
mv /home/user/www.quicksilvermail.net/qsaam/QSAam*.zip.sig /home/user


## Verify archive. Fingerprint should match the key above.
gpg --verify-options show-notations --verify QSLite*.zip.sig QSLite*.zip
gpg --verify-options show-notations --verify QSAam*.zip.sig QSAam*.zip


## Install Wine.
sudo apt-get install wine

## Run Wine to create its directories. Cancel Wine Mono Installer.
wine run

## Create folder for QS components and transfer them.
mkdir /home/user/.wine/drive_c/QS/
unzip QSLite*.zip -d /home/user/.wine/drive_c/QS/
unzip QSAam*.zip -d /home/user/.wine/drive_c/QS/

## Select 'Replace All' when prompted for duplicate files.
A

## Open Terminal and create links to allow QSL and QSA to use Debian gpg:
mkdir .wine/drive_c/QS/gpg-links
link '/home/user/.gnupg/pubring.gpg' '/home/user/.wine/drive_c/QS/gpg-links/pubring.gpg'
link '/home/user/.gnupg/secring.gpg' '/home/user/.wine/drive_c/QS/gpg-links/secring.gpg'

## Run QSL. This way is needed only for the initial run it applies to QSA too. Access QSL from the desktop shortcut afterwards.
cd /home/user/.wine/drive_c/QS
wine qsl.exe

## Setup QSL.
Setup -> Draw randomly in window until "OK" appears ... click "OK" -> Check: Create desktop shortcut | Email Address: yournym@nymphet.paranoici.org -> SMTP Server: gbhpq7eihle4btsn.onion -> Leave SMTP Proxy setings unchanged -> Leave HTTP Proxy setings unchanged -> Finish

(Note: Mixnym's SMTP Onion Service used. Tor Transport used - stream isolation unnecessary)


## Configure QSL.
Open Tools | Options.
...In General tab:
......Under "User Mode", check "Expert".
......Under "On Start-up", check "Open Template Dialog".
...In PGP tab:
......Check "PGP Public Key Encryption".
......For "Private Keyring", use "C:\QS\gpg-links\secring.gpg".
......For "Public Keyring", use "C:\QS\gpg-links\pubring.gpg".
......Click "Default key" and select it (will be just your new one).
......If desired, choose to cache private-key passphrases for five minutes or so.
...In Mix tab:
......Select "once a day" for "Update remailer stats".
...Click "Ok" to finish.
Open Tools | Stats manager.
...Click "Update".
...When you see "done!" click "Ok".
...If it stalls, there's something wrong with your Tor setup.
......Check with Firefox, and also check Tor config in Tools | Proxies.
Open Tools | Allpingers manager.
...Click "Update".
...When you see "done!" click "Ok".


Now you'll configure the message that QSL uses to create a Mixnym nym.
In the main compose pane, customize the message to look like the following:

Code:

Fcc: nyms
Host: gbhpq7eihle4btsn.onion
From: nobody@nowhere.net
Chain: *,*,*; copies=2;
To: send@nymphet.paranoici.org
Subject:

hsub: New Mail For Jude!

-----BEGIN PGP PUBLIC KEY BLOCK-----

mQINBFFP2l4BEACXJDUM6SxyjUk8K+MJ4fRJ5VMaE6hSsAD6n8eO04l9HMzSx26X
<snip>
wnOpR4sYYD9MFLura6+YiHWtT8ih
=ndP9
-----END PGP PUBLIC KEY BLOCK-----

~~

In the above:
...Replace "Jude" in "hsub: New Mail For Jude!" with your fake first name.
...Replace the public key block with your public key that you exported above. Get it by exporting it from KGpg then copy-paste the contents.
...Be very careful near line ends ... Unix vs DOS newline can be buggy here.
...The "~~" at the bottom, preceeded by two blank lines, is crucial!
Save as "nym create template".
...You can reuse it with edits for creating other nyms.
Click the PGP lock and signing icons.
......The mixnym server will only accept signed configuration requests.
Now click "Send"
"PGP Enrypt to Recipients..." prompt will appear.
...Choose the Nymserver key from the top pane then click "OK"
Enter your key passphrase when prompted to sign message.
After it finishes, you should see:

Code:

0 in message queue
0 in problem queue
2 sent

All mail sent!

If it worked, the next step is configuring QSA.
If it hangs, cancel out and go back through everything looking for errors.
Close QSL when you're done (and ignore the crash error that you may see).

You can't get a reply from the Nymserver until you configure QSA.


## Run QSA.
cd /home/user/.wine/drive_c/QS
wine qsa.exe

## Setup QSA.
Check: Create desktop shortcut... click "OK"

If your Nymserver name and type is not listed you must add it first before you can add AAM subject lines encrypted to you.

Open Tools | Nymservers.
...New:
......Nymserver Domain: nymphet.paranoici.org.
......Type: Zax
...Click "OK" then "Done"
Open Tools | AAM Subject Lines.
...New:
...In AAM Subject Line Tab:
......Nym, select your nym's private-key".
......Subject (HSUB), use the one you set or "New Mail For Jude!" if you are following the example above.
...Click "OK" then "Done".
Only one AAM Subject Line can be configured to find your hsub. Be sure to enter it exactly as you did before or else QSA won't find it.
Click "Get Mail" from the main interface. Replies take a while.

## Clean-Up
rm -rf /home/user/www.quicksilvermail.net
rm QSLite*.zip
rm QSLite*.zip.sig
rm QSAam*.zip
rm QSAam*.zip.sig
rm /home/user/Desktop/"QuickSilver Lite.lnk"
rm /home/user/Desktop/"QuickSilver Aam.lnk"
From: Header Support
For a list of remailers that accept From: headers.[124]
No longer applies as we are now using vm xml templates for a standard configuration. The rest of the instructions for shared folders and spice have been moved into a readme file distributed with the images.
Do not use unxz! Extract the images using tar to /var/lib/libvirt/images/.
Before starting the new vm wizard we must create an internal isolated network that connects the workstation with the gateway.
Go to the VMM GUI --> Edit --> Connection Details --> Add button
Choose Template:Project name as network name
Edit subnet range to 10.0.0.2/24
Uncheck the dhcpv4 option
Ignore anything to do with ipv6
Keep the default option of: Isolated Virtual Network selected and click finish.
The next steps may need more work to customize vm devices and clock to safe defaults. Work in this area not final.
Create a Template:Project name Gateway vm first and choose to edit it before installation.
Customize the first NIC that is included to be in default NAT mode.
Click to add hardware and chose another NIC.
This new NIC must have the newly created isolated virtual network 'whonix' selected as the network device. Finalize and launch.
Must enable disk controller as SATA
Must select qcow2 as storage format.
Create Template:Project name Workstation vm and make sure you select the isolated int. network for the only NIC this machine has. Launch.
Disk Controller works only with IDE
Must select qcow2 as storage format
Don't forget to take snapshot.
Done!
-SPICE is enabled for graphics by default but needs a vdagent to be installed in the guest vms for accelerated 2D in vm to happen. Not included in workstation install by default which impacts performance greatly.
It should be safe for use unless you Adrelanos determine otherwise. 2D and 3D in VBox have an insecure architecture and even the manuals admit to this. 2D in VBox is not even available for anything but windows guests which is not recommended and insecure of course. Everything Linux based is designed from the ground up with security considerations in mind.
Clock disabling for vms on host is recommended. Still haven't done it yet, and it seems to need command line.
Enabling SPICE
SPICE allows accelerated graphics and clipboard sharing. Its implications for security are an open question that needs a detailed answer rather than a vague clear cut one.
1. Enable SPICE by selecting it from the VMM GUI. (It is the default option if you decide not select VNC when creating the VM).
Not enabling SPICE from the beginning, will prevent the spice channel device from being added which impacts performance. To fix this add a channel device and select SPICE. This steps is not necessary if you leave the defaults as they are at the beginning.
2. QXL is the GPU model that should be attached.
3. Install vdagent in guest and reboot.
.qcow file size too big?
Short:
It won't really take up 101 GB. Just ~ 2.6 GB. This is an issue with file managers, not Template:Project name.
Written and tested with Template:Project name 0.2.1 (Ubuntu precise). Many things can go wrong and none or the very least of them will be caused by Template:Project name. This has only limited support by the Template:Project name developers, because 1. it is not recommended for security reasons and 2. the guest additions related bugs and instructions are somewhat out of the scope of the Template:Project name project.
Installation is somewhat difficult and no packages exist. Just search the internet and you'll see, that loads of people having issues installing the VirtualBox guest additions. People having problems for years. VMware is of no alternative, people are also having trouble installing the VMware tools into Linux guests. The issue with the guest additions is ridiculous. For years no solution has been found. With each kernel update, recompilation is required, and quite often, due to some updates, complication becomes difficult or impossible for a long time.
If you are having trouble, than in most cases not because of Template:Project name. The Template:Project name setup is a regular Ubuntu Linux and VirtualBox. You can try asking the regular VirtualBox and Ubuntu resources if you have trouble.
TorChat source package
HowTo
EXPERIMENTAL Experimental as in it is difficult to install. Only use it in case you trust TorChat. There shouldn't be any anonymity leaks and it should be as safe as other onion services in general and in Template:Project name.
Learn about Onion Services in Template:Project name first and learn how to set up the hidden webserver. This will ease following this guide.
Backup your key, if you want to ever restore it one another machine, a newer Template:Workstation product name or after hdd failure.
/var/lib/tor/torchat_service/private_key
Download the latest Python version of TorChat source code, for example as time of writing torchat-source-0.9.9.553.zip - Python source code (classic standalone 0.9.9 version) from (https://github.com/prof7bit/TorChat/downloads) and store it in /home/user.
And then configure the files inside /home/user/.torchat. I don't know if that may be the better way.
Mixmaster
MX capable DNS resolver
No longer required.
Mixmaster needs to resolve MX DNS records, while Tor does not support that. We have to install a DNS resolver capable of doing that. It still comes with caveats.
Security considerations when replacing the system wide DNS resolver:
The third party DNS resolver traffic goes through its own circuit, which is good.
All (custom installed) applications not configured to use a SocksPort (see [Stream Isolation]), would resolve their DNS through the system wide DNS resolver, which would be the third party resolver, giving too much power to it, because it is always the same, only one service provider, not changing like Tor circuits but static. ## Install Postfix ##
Technical background: Mixmaster requires either - a) An (open) smtp server SMTPRELAY in /etc/mixmaster/remailer.conf. Unfortunately, I haven't found any open smtp server (search term: open relay). A mailserver where the user registers first would probably work, but this would defeat the original idea: sending e-mails without depending on registration. Or, - b) a mta (mail transfer agent), which speaks to the remailer directly. TODO: Are there enough Tor exit relays, which allow the SMTP port and does their ISP allow to speak SMTP? If there are too few servers, it could be bad for anonymity.
Open /etc/postfix/main.cf.
lxsudo mousepad /etc/postfix/main.cf
Replace the content with the following.
# See /usr/share/postfix/main.cf.dist for a commented, more complete version


# Debian specific:  Specifying a file name will cause the first
# line of that file to be used as the name.  The Debian default
# is /etc/mailname.
#myorigin = /etc/mailname

smtpd_banner = $myhostname ESMTP $mail_name (Debian/GNU)
biff = no

# appending .domain is the MUA's job.
append_dot_mydomain = no

# Uncomment the next line to generate "delayed mail" warnings
#delay_warning_time = 4h

readme_directory = no

# TLS parameters
smtpd_tls_cert_file=/etc/ssl/certs/ssl-cert-snakeoil.pem
smtpd_tls_key_file=/etc/ssl/private/ssl-cert-snakeoil.key
smtpd_use_tls=yes
smtpd_tls_session_cache_database = btree:${data_directory}/smtpd_scache
smtp_tls_session_cache_database = btree:${data_directory}/smtp_scache

# See /usr/share/doc/postfix/TLS_README.gz in the postfix-doc package for
# information on enabling SSL in the smtp client.

myhostname = host.localdomain
alias_maps = hash:/etc/aliases
alias_database = hash:/etc/aliases
mydestination = host, host.localdomain, localhost.localdomain, localhost
mynetworks = 127.0.0.0/8 [::ffff:127.0.0.0]/104 [::1]/128
mailbox_command =
mailbox_size_limit = 0
recipient_delimiter = +
inet_interfaces = loopback-only
inet_protocols = all

relayhost = 1.1.1.1
#relayhost = 2.2.2.2
Users, who have an (anonymous) sourceforge.net account, could go to the Template:Project name sf.net Project Page, scroll down to Update Notifications and hit the Subscribe to Updates button. They would receive notifications about new releases sent to their (anonymous) [E-Mail] address.
There is currently no way for users to subscribe to sf.net blogs or wiki, but such a feature has been requested.
Sourceforge.net E-Mail Notification
Didn't work reliable.
E-mail notification: For users having an account on sf.net, there is on sf.net git is an E-Mail subscribe button: M.
This is an example how such a mail could look like:
You can skip this chapter. It is no longer of use, because if you use BetterPrivacy as recommended above, you won't need this.
Flash applications can set cookies, so-called Local Shared Objects (LSO), independently of the browser's settings. These cookies are able to save data up to 100 Kb. Usually, they save settings but they may be used to track surfers as well.
In order to manage the settings of your Adobe Flash Player, Macromedia offers a Flash application on its website. There you may e.g. configure the rules concerning the data storage and the rights for using camera and microphone. The settings are spread over several flash applications. Deactivate all functions that allow sharing and saving of data. The storage of LSOs may be deactivated on the Global Storage Settings panel.
Hint: Only in case you previously deactivated JavaScript: You must have Javascript enabled for adobe.com and macromedia.com temporary to run the Flash application.
Furthermore, the cookies already saved have to be deleted. This functionality may be found on the Website Storage Settings panel.
Personal side note: you see how ridiculous that plugin is, if the usage of the Flash settings manager depends on their website being reachable.
Build Documentation dpkg-source commit
To dpkg commit changes, run the debian upstream tarball creation script.
./help-steps/make-debian-package-upstream-tarball
Then run.
dpkg-source --commit
When it asks "Enter the desired patch name:" just enter anything you wish, for example "buildconfig". In the following window, you don't have to fill out anything. Just save and close the editor. [126] You only have to do this once and won't be asked again to do this, unless you add another change which needs to be dpkg-source committed.
If you want to undo the dpkg-source committed change, check the contents of the .pc and the debian/patches folder and delete it.
Since the Template:Project name debian package version number is auto derived from git describe and used for [[Download#Template:Project name_Version_Check_and_Template:Project name_News|Template:Project name News]] download, it is recommended to override it. [127] You could add a file to buildconfig.d, for example buildconfig.d/50_version and add for example.
temp="$WHONIX_BUILD_CLOSEST_GIT_TAG"

## Using `export`, so whonix_shared/usr/share/whonix/chroot-scripts-post.d/70_log_build_version can read it.
export WHONIX_BUILD_WHONIX_VERSION_NEW="$(echo "$temp" | sed 's/-/./g')"

echo "WHONIX_BUILD_WHONIX_VERSION_NEW: $WHONIX_BUILD_WHONIX_VERSION_NEW"

WHONIX_BUILD_NEW_CHANGELOG_VERSION=""$WHONIX_BUILD_WHONIX_VERSION_NEW""-debpackage""$WHONIX_BUILD_NEW_DEB_REVISION_VERSION""

echo "WHONIX_BUILD_NEW_CHANGELOG_VERSION: $WHONIX_BUILD_NEW_CHANGELOG_VERSION"
While building, check if WHONIX_BUILD_NEW_CHANGELOG_VERSION looks sane. [128]
If you added a new file to buildconfig.d, for example buildconfig.d/50_target_arch, those have to be dpkg-source committed before building Template:Project name. Otherwise you'll get an error message. (Which looks like this:[129]).
<html><a href="magnet:?xt=urn:btih:fba5ace7a163afae54aa1677cf92540a38d5914c&dn=Template:Gateway product name short.ova&tr=http%3A%2F%2Fannounce.torrentsmd.com%3A6969%2Fannounce&as=http%3A%2F%2Fwebseed.whonix.org%3A8008%2FTemplate:Gateway product name short-0.5.6.ova">Magnet Link</a></html>
<html><a href="magnet:?xt=urn:btih:7255075def146b6f5d7b6e23121e1e5a5bedf13d&dn=Template:Workstation product name short.ova&tr=http%3A%2F%2Fannounce.torrentsmd.com%3A6969%2Fannounce&as=http%3A%2F%2Fwebseed.whonix.org%3A8008%2FTemplate:Workstation product name-0.5.6.ova">Magnet Link</a></html>
All XChat plugins have been deactivated (hardening) and moved to /usr/lib/xchat/plugins.disabled. If you really need a plugin, such as perl for SASL, you can use the example below.
(5) Go into /home/user/ with the file manger. (Dolphin)
(6) Extract the Tor Browser Bundle. Right click on the downloaded archive -> extract -> extract archive here.
(7) In case you downloaded another version than en-US, rename the tor-browser_lang folder to tor-browser_en-US. This is important, because the paths in the following script are hardcoded.
(8) Go into the /home/user/tor-browser_en-US folder.
(9) Delete start-tor-browser or move it to the /home/user/tor-browser_en-US/Docs folder.
(10) Create a new file within the /home/user/tor-browser_en-US/ folder called start-tor-browser with the following content.
#!/bin/bash
## {{project name}} Tor Browser start script

export TOR_SKIP_LAUNCH=1

cd ~
~/tor-browser_en-US/App/Firefox/firefox --profile ~/tor-browser_en-US/Data/profile

## End of {{project name}} Tor Browser start script
(11) Make the start-tor-browser script executable. Right click on start-tor-browser -> Properties -> Permissions -> enable the Is executable box -> ok.
(12) Go to /home/user/tor-browser_en-US/Data/profile/ and create a file user.js with the following content.
## Begin of patched user.js.

## If you edit this file while Firefox is running, your changes will be
## overwritten, when you close Firefox.

## How to create the user.js network settings:
## 1. Make a backup of prefs.js.
## 1. Start Tor Browser with the patched start script.
## 2. Apply proxy settings using the Tor Button settings dialog..
## 3. Make a diff from the old and the new pref.js.
## 4. Copy the relevant changes to user.js.

## network settings
## (Are now set in /etc/environment - or not...)
## (See /etc/environment.)
user_pref("extensions.torbutton.use_privoxy", false);
user_pref("extensions.torbutton.settings_method", "custom");
user_pref("extensions.torbutton.socks_host", "10.152.152.10");
user_pref("extensions.torbutton.socks_port", 9100);
user_pref("network.proxy.socks", "10.152.152.10");
user_pref("network.proxy.socks_port", 9100);
user_pref("extensions.torbutton.custom.socks_host", "10.152.152.10");
user_pref("extensions.torbutton.custom.socks_port", 9100);

## End of {{project name}} user.js.
(13) If you want to make 100% sure you never have Tor over Tor, you must shut down Template:Gateway product name while doing the following.
Template:Workstation product name has an empty Tor package installed by default, called Dummy Tor package. It contains no files, besides some default files[137], which are required to create a dummy package. Debian packages are standard Unix ar archives, auditors can unpack and check them.
The reason for installing the Dummy Tor package inside Template:Workstation product name is to prevent installing the Tor package from the upstream (Debian or The Tor Project) repository, to prevent running Tor over Tor. This allows installation of packages, which depend on Tor, such as TorChat and parcimonie on Template:Workstation product name.
Everything is inside the whonix_workstation/usr/local/share/whonix/dummytor/ folder in Template:Project name source code
and subsequently in /usr/local/share/whonix/dummytor/ in Whoix-Workstation.
.deb package format
/usr/local/share/whonix/dummytor/tor is the control file
/usr/local/share/whonix/dummytor/tor_1.0_all.deb is the package which was installed using dpkg by whonix_workstation/usr/local/share/whonix_internal_install_script.
whonix_workstation/usr/local/share/whonix/dummytor/dummytor is the "build script" for the package, which is actually only a single "equivs-build ./tor" command.
sudo apt-get dist-upgrade

Reading package lists... Done
Building dependency tree
Reading state information... Done
Calculating upgrade... Done
The following packages have been kept back:
  tor
Tor Browser
FoxyProxy Sandboxing Warning
Tor Browser will soon ship with sandboxing on an opt-in basis. Unfortunately, the initial sandbox versions are incompatible with this configuration and it must not be enabled. [138] Users with AppArmor enabled may see Tor Browser profile warning messages. These messages can be safely ignored, since they do not prevent FoxyProxy functioning at this time.
You could use Tor Button's settings dialog to set it to any other proxy or transparent torification. The latter means "no proxy", which will result in Tor Browser using whatever the operating system provides and if you don't have a VPN installed inside Template:Workstation product name, it will go through Tor's TransPort.
If you are using the transparent torification option in Tor Button, you could point a socksifier to start-tor-browser and it should work as usual.
If you are having problems, it is most likely a problem with Tor Browser / Tor Button's proxy settings. In Tor Browser open the pseudo url "about:config" and search for "network.proxy" and check if these settings are sane.
There are various update mechanisms. Not all are equally secure. Template:Project name recommends against using Tor Browser's internal updater for security reasons. [141] Using Tor Browser Updater (Template:Project name) is recommended. To enable you to distinguish them, here are some screenshots of the various updaters.
If you aren't using Physical Isolation, i.e. if you use the Default-Download-Version (Virtual Machines), it is probably better to use the desktop locking mechanism of your host operating system.
These features are inherited from Debian and its packages.
Tor Browser's internal update check mechanism is untouched and works fine. Default homepage is untouched and still https://check.torproject.org.
New Identity Button
Note that, if you are using the Tor Browser, which comes with Template:Project name, that the New Identity button of Tor Button is defunct (greyed out). This is because Tor Button can not access Tor's control port. Due to Template:Project name Technical Design, Tor Browser and Tor are isolated from each other, which means there is no way to fix this without loosing the added security by Template:Project name.
When using the regular Tor Browser Bundle (not Whonix!), the New Identity button unlinks your old identity, changes your circuit (exit relay IP) and creates a fresh identity.
As a workaround close Tor Browser, change your circuit with Arm and start Tor Browser again.
This is not a big issue, since the New Identity button is not perfect yet anyway, there are open bugs.[142]
When running torbrowser -update, the update script creates a user.js file, for example ~/tor-browser_en-US/Data/profile/user.js. User.js is used to override some Tor Button defaults, namely the SocksProxy settings and other minor misc settings. [143] See also the Tor Browser sub chapter on the Stream Isolation page.
For better isolation of different identities. For advanced users. Moved to the [[Advanced_Security_Guide#More_than_one_Tor_Browser_in_Template:Project nameAdvanced Security Guide]].
(5) Go into /home/user/ with the file manger. (Dolphin)
(6) If you still have the old version of TBB opened (because you are probably reading this from the old TBB), close it. (copy the next steps to Kwrite if necessary)
(7) Rename your old TBB /home/user/tor-browser_en-US to something else.
(8) Extract the Tor Browser Bundle. Right click on the downloaded archive -> extract -> extract archive here.
(9) In case you downloaded another version than en-US, rename the tor-browser_lang folder to tor-browser_en-US. This is important, because the paths in the following script are hardcoded.
(10) Go into the /home/user/tor-browser_en-US folder.
(11) Delete start-tor-browser or move it to the /home/user/tor-browser_en-US/Docs folder.
(12) Create a new file within the /home/user/tor-browser_en-US/ folder called start-tor-browser with the following content.
#!/bin/bash
## {{project name}} Tor Browser start script

export TOR_SKIP_LAUNCH=1

cd ~
~/tor-browser_en-US/App/Firefox/firefox --profile ~/tor-browser_en-US/Data/profile

## End of {{project name}} Tor Browser start script
(13) Make the start-tor-browser script executable. Right click on start-tor-browser -> Properties -> Permissions -> enable the Is executable box -> ok.
(14) If you want to make 100% sure you never have Tor over Tor, you must shut down Template:Gateway product name while doing the following.
#!/bin/bash
## {{project name}} Tor Browser start script

~/tor-browser_en-US/App/Firefox/firefox --profile ~/tor-browser_en-US/Data/profile

## End of {{project name}} Tor Browser start script
Use
#!/bin/bash
## {{project name}} Tor Browser start script

## Adjust the path!
~/tor-browser_2/App/Firefox/firefox --profile ~/tor-browser_2/Data/profile -no-remote

## End of {{project name}} Tor Browser start script
Only -no-remote was added to the start script. Otherwise Tor Browser would connect to the already running Tor Browser and this is not what you want. And don't forget to adjust the path to the other Tor Browser.
A simple technique to increase the trust you can put in the Template:Project name signing key would be to download it several times, from several locations, several computers, possibly several countries, etc.
You could also use this technique to compare keys downloaded by your friends or other people you trust.
Downloading the key from the same server only lowers the possibility of a man-in-the-middle attack for a part of the route. The following figure illustrates that best:
user <-> user ISP <-> internet <-> sourceforge.net ISP <-> sourceforge.net server
MITM less likely for this route |  no help for this route
For this reasons adrelanos' homepage, which describes and contains adrelanos' OpenPGP key is mirrored at six different places. Download adrelanos' key from all those places and store it as adrelanos1.asc, adrelanos2.asc, adrelanos3.asc, etc.
SSL available. [144] Anyone can edit the torproject.org wiki and exchange content with malicious one. Therefore check the history feature. Obviously, I do trust Tor and torproject.org. My wiki account "proper" should be genuine, therefore changes by "proper" should be legit.
SSL available. [144] The following command is recommended to enforce downloading the key over SSL:
## Not forced through Tor, unless you are using [[:Template:Project name]], torsocks or similar.
curl --tlsv1.3 --output adrelanos.asc.4 https://savannah.gnu.org/people/viewgpg.php?user_id=89289
6. adrelanos' OpenPGP key mirror on OpenPGP keyserver
No SSL. Should really be only used as a mirror.
## Not forced through Tor, unless you are using {{project_name}}, torsocks or similar.
gpg --keyserver x-hkp://pool.sks-keyservers.net --recv-key 916B8D99C38EAF5E8ADC7A2A8D66066A2EEACCDA
<html><a href="magnet:?xt=urn:btih:405e051b5309fb66fd7ba9a04066936de64ce478&dn=Template:Gateway product name short-7.ova&tr=http%3A%2F%2Fannounce.torrentsmd.com%3A6969%2Fannounce&as=http%3A%2F%2Fwebseed.whonix.org%3A8008%2FTemplate:Gateway product name short-7.ova">Magnet Link</a></html>
=== Connection Issues - Tor stops working after an Upgrade and needs a Workaround ===When upgrading to Tor 0.2.4.19-1~d79.jessie+1 (using sudo apt-get dist-upgrade), your Tor connection may go down. There is a temporary workaround.
Open /etc/default/tor.
## If you are using a graphical {{gateway_product_name}}, use:
kdesudo kate /etc/default/tor

## Or alternatively, if you are using a terminal-only {{gateway_product_name}}, use:
sudoedit /etc/default/tor
Scroll down, near bottom comment in (by removing the # in front of it).
=== Virtual Box Shared Folder Issues ===Shared Folders aren’t working with the latest Linux kernel. (This is a Debian/Virtual Box issue, not caused by Template:Project name. Has already been reported to upstream by a Debian user.)
=== Tor Browser Starter (Template:Project name) ===After manually upgrading Tor Browser (see above)... To start Tor Browser, got to your /home/user/tor-browser_en-US folder and double click start-tor-browser. Or type in terminal (Konsole).
=== Enigmail Encryption ===When using OpenPGP encryption in Thunderbird / Enigmail you might get "encryption command failed".
Thunderbird has been updated in Debian Testing in meanwhile. Upgrade it.
sudo apt-get update
sudo apt-get dist-upgrade
You should then install enigmail as usual:
sudo apt-get install enigmail
=== Defunct Desktop Shortcuts ===The desktop shortcuts Tor Browser, Contribute, Forum, Documentation, Donate won't work until there is an upgrade of Template:Project name. Please manually visit these pages. How to start Tor Browser has already been explained above.
Long answer:
This is because torproject deprecated that repository. That was to be expected. The repository we're using now is already preconfigured (in /etc/apt/sources.list.d/torproject.list).
Taking action is not important at this stage. You can comment it out (by putting a # in front of it) in /etc/apt/sources.list.d/torproject.list if you want. (kdesudo kate /etc/apt/sources.list.d/torproject.list for graphical Template:Gateway product name or sudoedit /etc/apt/sources.list.d/torproject.list for terminal-only Template:Gateway product name) If you don't do it, it will be auto fixed with next upgrade of Template:Project name.
There is no public key available for the following key IDs
The message "There is no public key available for the following key IDs" is not necessarily an error. It might be just a warning/information.
sudo apt-get update
...
Reading package lists... Done
...
W: There is no public key available for the following key IDs:
9C131AD3713AAEEF
Check the exit code of apt-get.
echo $?
0
When it is 0, there is no problem. This is due to key transition, because Template:Project name repository is currently signed with the old and the new signing key.
Reasons for Staying Anonymous Developer
Security and trust shouldn't depend on showing a face:
(You need to adjust the names vmdk_file and vdi_file.)
2. Use qemu-img to convert the vdi to qcow2. Why qcow2? Because it supports snapshotting, which is very useful for reverting Template:Workstation product name to a known clean state. You must not revert gateway snapshots of the gateway vm as that will change your guard nodes which is not good for anonymity. This would increase your chances of having a rogue guard node and exit.
Lucid has been reported, not to work. Since it is only supported until 2013-04 it won't be fixed.
Mirror
| {{GrayBackground}}| [[File:SSL_Symbol.png|40px]] {{Anchor|signature}}
| <html><a href="https://jhcloos.com/whonix/{{project_name_short}}-</html>{{VersionNew}}<html>/{{gateway_product_name_short}}-</html>{{VersionNew}}<html>.ova" target="_blank">Download</a></html>
| <html><a href="https://jhcloos.com/whonix/{{project_name_short}}-</html>{{VersionNew}}<html>/{{workstation_product_name}}-</html>{{VersionNew}}<html>.ova" target="_blank">Download</a></html>
|{{Yes}} <ref name=anonymousdownload />
| style="background-color: {{Red}}"| Low <ref>[[Warning#Man-in-the-middle_attacks|Man-in-the-middle attacks]] could poison the download.</ref>
| style="background-color: {{Green}}"| High <ref name=openpgpverification>It does not matter if you did the bulk download over an insecure channel, if you use OpenPGP verification at the end.</ref>
|- style="height: 47px"
Magnet Link
| {{GrayBackground}}| [[File:Magnet_icon.svg.png|20px]] <ref>Magnet link clients known to work: gtk-gnutella. Check this [https://en.wikipedia.org/wiki/Magnet_URI_scheme#Clients_table clients table]. If nobody is [http://wiki.answers.com/Q/What_are_seeders_and_leechers seeding] at the time, only clients with the [https://en.wikipedia.org/wiki/Magnet_URI_scheme#Normal_.28as.29 "as"] feature can be used, because we are providing a [https://en.wikipedia.org/wiki/BitTorrent#Web_seeding webseed].</ref>
| <html><a href="magnet:?xt=urn:btih:b8969f87015c994f2c4dd93b3ed7c62861c27477&dn={{gateway_product_name_short}}-8.ova&tr=http%3A%2F%2Fannounce.torrentsmd.com%3A6969%2Fannounce&as=http%3A%2F%2Fwebseed.whonix.org%3A8008%2F{{gateway_product_name_short}}-8.ova">Magnet Link</a></html>
| <html><a href="magnet:?xt=urn:btih:7a6a5294ebebef5e5edcb05aa2caf66ebaeaf300&dn={{workstation_product_name}}-8.ova&tr=http%3A%2F%2Fannounce.torrentsmd.com%3A6969%2Fannounce&as=http%3A%2F%2Fwebseed.whonix.org%3A8008%2F{{workstation_product_name}}-8.ova">Magnet Link</a></html>
|{{No}}
| style="background-color: {{Yellow}}"| Medium <ref name=atleastssl />
| style="background-color: {{Green}}"| High <ref name=openpgpverification />
|- style="height: 47px"
sudo su
cd /var/www
wget http://releases.wikimedia.org/mediawiki/1.22/mediawiki-1.22.3.tar.gz
tar -xvzf mediawiki-1.22.3.tar.gz
mv mediawiki-1.22.3 wiki
Database name: wiki
Datebase password: what you remembered above
No more questions.
Otherwise use the defaults.
Name of wiki:
Whonix
Download LocalSettings.php, safe as /home/user/LocalSettings.php.
Tor Browser Recommended
When you start Tor Browser Recommended, there is a shortcut on the desktop, see , it will open both Template:Project name News Blogs in a privacy friendly way.
In Template:Project name 8:
I2P-0.9.11 this doesn't work - I2P complains about clock skews even after disabling both sdwdate and bootclockrandomization.
sudo service sdwdate stop
sudo chmod -x /etc/init.d/sdwdate
It is still possible to fix the clock manually. For example, if I2P reports a clock skew of 60 seconds at startup, use this command to change system time:
sudo date -s now-60sec
then restart I2P.
However, time sync management in Template:Project name is a complex issue, so before changing the default way of time management in Template:Project name, make sure to read Dev/TimeSync and understand the implications.
old known issues
gpg keyserver unreachable
Open gpg.conf.
kwrite ~/.gnupg/gpg.conf
Search for all instances of "keyserver". And comment them out, i.e.
#keyserver ...
Add a functional keyerver at the bottom. In Template:Project name 9 we will be using the following one as default.
keyserver hkp://qdigse2yzvuglcix.onion
libtorsocks Warning
During running apt-get dist-upgrade, you may see a warning similar to the following one.
15:36:37 libtorsocks(12225): sendmsg: Connection is a UDP or ICMP stream, may be a DNS request or other form of leak: rejecting.
Cannot talk to rtnetlink: No such file or directory
acpid: error talking to the kernel via netlink
Sounds scary, but is of no concern. See footnote for technical explanation. [152]
Contains python-stem, which is a Tor controller library. It is in use to ask for Tor's bootstrap status. This is required for whonixcheck (diagnosing connection issues) and TimeSync (TimeSync starts as soon as Tor is bootstrapped). See this ticket for more details. The alternative, uploading python-stem to Template:Project name APT Repository is not doable given Template:Project name contributor size. (It would require keeping up with the original package and updating when they update. And implementing the feature, allowing builders to build Template:Project name from source code without touching Template:Project name APT repository for Trust reasons would also have been more difficult.)
Being based on stable and incorporating a few packages from testing is difficult, see this ticket for details.
Contains build dependency config-package-devwith debhelper support. (We could probably build on stable and just get the config-package-dev with debhelper support elsewhere, but it is simpler just to require Debian testing as build operating system.
Stable (Wheezy) contains only obfs2 (obfsproxy 0.1.4), while Testing (Jessie) contains obfs3 (obfsproxy 0.2.3), and obfsproxy has been recently removed from torproject's apt repository.
In Template:Project name 9... When upgrading to Tor 0.2.5.8-rc-1~d70.wheezy+1 (using sudo apt-get dist-upgrade) in Template:Project name 9, your Tor connection may go down. There is a workaround.
Open /etc/apparmor.d/local/system_tor.
## If you are using a graphical {{gateway_product_name}}, use:
kdesudo kate /etc/apparmor.d/local/system_tor

## Or alternatively, if you are using a terminal-only {{gateway_product_name}}, use:
sudoedit /etc/apparmor.d/local/system_tor
Scroll down until you see.
/usr/bin/obfsproxy rix,
Comment out (by adding a # in front of it).
#/usr/bin/obfsproxy rix,
Then reboot.
sudo reboot
You should keep that in mind. When Template:Project name fixes that bug, you'll get an interactive dpkg conflict resolution dialog. This is explained in Security Guide#Updates. Just choose to install the new /etc/apparmor.d/local/system_tor file then.
If you wonder during boot about following warning.
Warning /etc/apparmor.d/... network rules not enforced.
This is not a security issue. Template:Project name installs AppArmor and the apparmor-profiles package by default, but does not enforce AppArmor by default. We are not there yet and Debian also does not enforce AppArmor by default yet either. The apparmor-profiles package gets installed by default for better usability, to make enforcing AppArmor easier. This warning only reflects, that the profile is not enforced by default.
Searching[154] for Debian packages containing VirtualBox was a wise thing. In past it was sometimes a real pain to install the guest additions. The search brought up, that honorable people created a debian package with the tools.
4. NOTE: Sometimes after reboot the Workstation guest fails to pick up a new resolution. Try to change the screen resolution manually a few times, from KDE settings. Once it succeeds to change to fullscreen, the change will stay persistent across reboots.
Not sure if the jessie instructions are still up to date. Maybe the ones for wheezy also work for jessie just fine.
Inside your VirtualBox virtual machine.
This version is difficult to get working with guest additions and vbox shares. Debian Jessie has the issue that Template:Project name installs with Kernel 3.10 and the distro is at 3.12, and the 3.10 headers are not available. Therefore, it is dangerous (and unsafe) to get the Kernel headers on a different repository. Additionally, there are reports that updating the kernel can cause issues (and is also unsafe).
Noteː It has been reported that reverting Virtualbox 2 versions back with 3.10 can also solve issues. Update this wiki with your results.
Build Warnings
Short: Don't install apt-listchanges as custom package during VM image builds or don't have it installed during --target root builds.
Long: Because likely might change the build process from a non-interactive one to an interactive one. You're better off purging apt-listchanges.
sudo apt-get purge apt-listchanges
Alternatively, you could use a non-interactive frontend for apt-listchanges such as text. To do so, you would have to edit /etc/apt/listchanges.conf.
sudoedit /etc/apt/listchanges.conf
[apt]
frontend=text
After Template:Project name has been build, you're free to reinstall apt-listchanges.
Tor Browser
Change/Remove Proxy Settings
This is an advanced topic. You most likely only need it for advanced tunneling scenarios.
You could either:
Use Tor Button's -> Preferences to set it to any other proxy or no proxy. Transparent Torification means, "no proxy" or in other words it means "use whatever the system provides".
1) Click on Tor Button.
2) Click on Preferences.
3) Choose Transparent Torification.
4) Click OK.
For an alternative method, setting Transparent Torification which does not involve Tor Button's graphical user interface, see footnote [156].
Forget about Tor Button's -> Open Network Settings. See footnote, if you want to know why.[157]
Grub Fix
Introduction
The following instructions differ for 686-pae and 486 kernel users.
Are you are 686-pae kernel kernel or 486 kernel user?
If you previously did not choose any options right after starting Template:Project name in the grub boot menu, if you don't know what this is about, then you're very likely a 686-pae Kernel User.
If you are used to picking the 486 kernel as per [[Starting_Whonix#Boot_Options|page Starting Template:Project name, chapter Boot Options]], then you already know, that you're a 486 Kernel User.
1. Weakest: On Tor Browser, click on the Torbutton and then click on "New Identity". However your current browser session will be lost.
2. Better: Install a second browser and configure it to use its own SocksPort, see [[Tor_Browser#More_than_one_Tor_Browser_in_Template:Project nameMore than one Tor Browser in Template:Project name]].
IsolateDestAddr and IsolateDestPort for Tor Browser (Recommended against!)
(Recommended against!) If you are interested anyway, see footnote [158].
Qubes
Torified dom0 Updates
Now in Qubes wiki.
Go to Qubes VM Manager -> System -> Global Settings. See the UpdateVM setting. Choose your desired Template:Gateway product name ProxyVM from the list. For example: sys-whonix.
Qubes VM Manager -> System -> Global Settings -> UpdateVM -> sys-whonix
OR, to install Workstation with complete Gnome applications that are installed in Qubes Fedora templates:
For Gnome, read security notes on Other Desktop Environments.
The Gnome version of the Template:Workstation product name TemplateVM may be too large and will you need to increase the allowed update size to accommodate installing it.
You can repeat this guide multiple times and create as many Template:Gateway product name ProxyVM instances as you need, for greater Tor isolation. Note that using multiple Template:Gateway product name ProxyVMs simultaneously will reveal a pattern of connecting to multiple sets of Tor guard nodes, which may or may not be a unique usage indicator.
If connecting this AppVM to the internet, you will need an existing Template:Gateway product name ProxyVM instance to connect to. You may need to [[Qubes/Create_Gateway_ProxyVMs|create a Template:Gateway product name ProxyVM]] before proceeding.
Qubes and Debian updates install by default. If you would also like to install Template:Project name updates this way, then ensure you have the Template:Project name repository enabled -- (or disabled if you prefer). This setting will remain in your TemplateVM for later. On first run of template you will be presented with the Template:Project name repository options, but you may change them at any time.
If new updates were available and installed, you will need to either simply restart your running Template:Gateway product name ProxyVMs and running Template:Workstation product name AppVMs for them to be updated -- or alternatively apply this same update process again to your running VMs if not wanting to restart them right away.
qubes-release package
In dom0, upgrade qubes-release to Qubes' dom0 current testing repository. [161]
Only the Qubes R3.2 version of Template:Project name requires manual downloading of templates with qubes-dom0-update, which downloads Template:Project name from Qubes' dom0 templates-community-testing repository.
First you need to have the Qubes OS installed on your system. A helpful Installation Guide for Qubes OS 3.0 is found here
However, before installing Qubes OS on your system, after you have downloaded the Qubes ISO, make sure that you follow the Qubes OS security advice for verifying the signatures of the Qubes ISO found here
After you have Qubes OS up and running on your system, before you install Template:Project name you must next
Refer to the Computer Security Education chapters here and apply relevant steps.
Enigmail / gpg / keyserver
Since enigmail just calls gpg. And since everything is torified in Template:Project name anyway, and since gpg is stream isolated (by uwt wrapper) anyhow, there is no need for this setting in Template:Project name.
A bit suboptimal, since people have to create a second account just for github and it probably won't scale well enough in long term. Positive points are, that it works for many big projects such as Bitcoin and attracts a lot pull requests (for them). So let's see how that works.
Old Criteria and Plan for Web Hosting
Requirements for Good Hosting
Requirements
Some webspace and sufficient traffic.
Needs a wiki, a forum, a blog, a mailing list.
We can either use free project hosting or own hosting.
Tor friendly.
No tracking scripts. (Google analytics etc.)
Permit to sign up and to use the page exclusively over Tor.
A wiki on that site (media wiki). (And spoilers.) (And flagged revisions.)
A free SSL certificate.
All parts off the website reachable over SSL without any warnings.
sourceforge.net does not offer that (SSL warnings).
startssl.com offers free SSL certificates. You simply have to prove, that you have control over the domain - but that's not possible with subdomains.
Free - if that is possible. No one is willing to pay and in the beginning there are no donations.
We allow guest/anonymous postings (bug report, feedback, etc.) and moderate it very non-restrictive. (Allow any critique. Only delete off topic talk such as warez.)
It is still desired to have the less critical parts of the wiki open for guest edits.
Where no random trolls/crackers can modify anything important.
A wiki where guest edits are allowed only works when having a feature for Flagged revisions Sighted versions, where admins review changes and manually make the edited version the default visible page for everyone. To my knowledge, only mediawiki has such a feature.
Answered Questions
Is there a free project hosting fulfilling all requirements?
We better don't choose something based in non-free countries, such as US.
Fully accessible by text mode browsers.
Fully accessible without JavaScript.
Optionally reachable by an onion service.
Reviewed Hosting Services
sourceforge.net
In past, all components of Template:Project name were hosted on sourceforge.net. Template:Project name still uses sourceforge.net as primary bulk file download service. Unfortunately, sourceforge does not provide direct download links (hotlinking).
The internal wiki, forum and the mailing list and download mirrors provided by sf.net provide unlimited traffic, which is very good.
The forum provided by sourceforge.net was not very well suited for Template:Project name. Most users are expected to post to the forums over Tor. sourceforge.net doesn't handle changing IP's very well. Registered users often had to post twice until their message got stored. And if they haven't stored their draft beforehand it was lost, which was really annoying. Positive points were, that the forum was viewable over SSL, but only for registered users. Let's say user's managed to successfully post a message, then it was still confusing because the message had to be manually moderated due to automatic spam scripts targeting Template:Project name forum. Sourceforges wiki was unfortunately not viewable over SSL, which was very bad.
sf.net generally provides two different categories of hosting. Allura with "some" SSL, i.e. the wiki, forum, mailing list, download mirrors on the other hand project web.
Project web (no SSL) has somewhat low limited traffic, but according to their support will be manually increased.
A very strong point for sf.net is, that big files (virtual machine images) and unlimited traffic are allowed. Another strong one of course is, that sf.net allows Template:Project name to be hosted on sf.net.
Sourceforge.net blocks users from "Cuba, Iran, North Korea, Sudan, Syria".
Last time we checked wikipedia (wikimedia) derivatives and wikia weren't Tor friendly.
savannah
https://savannah.nongnu.org (with SSL) looked promising and they are expected to be gone soon or to do any other stupid stuff (banning countries etc.).
They offer homepages, for example http://www.nongnu.org/qwe/ but seems like there are no subdomains (qwe.nongnu.org) with SSL (for nongnu.org). That's the minimum requirement.
github.com offers sub domains, but they are not reachable over SSL.
github triggers ascary, error message. After either many pages trigger that error so it doesn't matter any more or until this message gets fixed in Tor Browser, we shouldn't use the github as issue tracker or website to avoid FUD. When that got somehow a non-problem, we could think about using github as issue tracker.
How autocreate table of contents using markdown on github? But...
We haven't found out yet how to use \[\[include ref=WikiHeader\]\] for github mediawiki pages. It is an important feature for Template:Project name pages.
Looks like mediawiki support is just a gimmick. More advanced formatting like font size, syntax highlighting and so on doesn't work.
The wiki supports less features, no html (not that important) and no tables. The side bar takes too much space and leaves too less page for the wiki. The wiki is more suited for smaller documentation but not as a whole website replacement like Template:Project name needs.
No file hosting service.
self hosted onion service
Adrelanos is not willing to do it.
free onion hosting service
We could host a website on third party (free) onion service webspace service.
Risky, because those services can go away any time without notice. - Looks like a valid risk, two just went down. [170]
Can they handle the load when we release a new version? Not talking about bandwidth. Just about page views.
Clearnet users could only access them through onion.to and tor2web.
In theory, an option could be to base Template:Project name on a distribution which is on their list already, but that might not be doable for technical reasons. (Questions open up, such as: Are they in sync with Debian unstable? Are they in sync with Debian testing? How long does it take until they deploy updates from security.debian.org? How up to date are their packages? How are they different from Debian?)
Template:Project name contacted FSF to be their list. Thes declined, because Template:Project name is not standalone. (Does not fulfill point "Complete Distros", since physical isolation users have to install Debian first.)
seul.org
Sent registration request for seul.org. They don't accept new registrations, but Roger Dingledine (surprise, surprise) said in private mail, he's seeding Tails already and would volunteer to seed Template:Project name, if there was an announcement mailing list or if we mailed him new releases. Doing this.
Conclusion
In summary there where no open source hosting sites, which offer SSL everywhere and unlimited download of big files. An open source hosting facility providing free webspace and SSL everywhere would be much desirable, but doesn't exist.
of mirror providers. We could contact them and ask if there were willing to provide direct download links (hotlinking) (+SSL) for Template:Project name.
When they are able to sponsor sourceforge, in comparison, sponsoring Template:Project name would be only peanuts to them. The question is, if they provide service for individual requests.
codeplex
Seem to offer direct download links. Just stored some random download links to see how long the direct link is valid.
and if they tell us: asked if we may use them as master mirror for other mirrors
November 2013: mirrorservice.org
asked if we are allowed to directly download from them
asked if we may use them as master mirror for other mirrors
Answer:
We have no problem with you direct linking to us or you suggesting other
sites using us to mirror from (we offer rsync too).

But bear in mind that the data in that mirror is controlled by
SourceForge. They don't ship all files to all mirrors - each mirror
specifies how much data it can take, and they put stuff on up to that
limit based on popularity (presumably). Their delivery mechanism knows
which files are on which mirrors, so end users don't get pointed at a
mirror that doesn't contain the file they're after.

So it is possible that we may not have a complete copy of all your files,
and it may change in the future without any intervention from us.

If you're happy with that situation then go ahead and link to us.
Answer to follow up email:
We don't have any upload facilities I'm afraid. We only offer downloads.

One solution is to run a private rsync server yourselves that only
certain mirrors can access. It doesn't have to be that quick.

You may find other mirrors do offer an upload facility though.
November 2013: switch.ch
asked for an upload account
asked for master rsync capabilities
Answer:
Dear Sir

Thank you for your e-mail of 25th November 2013 regarding {{project_name}}.

Sorry, we are not interested in your offer.
Forum Header
<center><b>Welcome to the new {{project name}} forums!</b></center>
<center><b>As part of the transition, everyone will have to reset their passwords, as they didn't come over in the transisition process. (<a href=https://forums.whonix.org/t/discourse-bug-report-thread/1612>forum thread</a>)</b></center>
All HexChat plugins have been deactivated (hardening) and deactivated using dpkg-divert. To re-enable them, use one of the following commands depending on which plugin you need.
Example only: This is just an example. Other tools could achieve the same goal.
Troubleshooting and alternatives: If this example does not work for you, or if you are not using Whonix, please refer to Open File with Root Rights.
3 Open the file with root rights.
sudoedit /etc/resolv.conf
Comment out.
#nameserver 10.152.152.10
Add.
## Riseup.net OpenVPN DNS server
nameserver 172.27.100.1
If you are not using riseup, you need to replace 172.27.100.1 and enter the virtual LAN IP address of your VPN providers DNS server. You might be able to obtain it from your VPN provider. You can also try to infer it after successfully connecting to the VPN from running "sudo route". The first destination default gateway should function as DNS server also.
Save.
If you want to be sure, that /etc/resolv.conf does not get overwritten by other packages. (Such as DHCP or resolvconf.)
sudo chattr +i /etc/resolv.conf
If you ever want to remove it, use -i.
(A more usable way is TODO research, help welcome. As possible starting point, see footnote. [174])
Details: Adds The Tor Projects's (TPO) APT repository to Anonymity Linux Distributions during build. - Useful, because TPO's repository sometimes contains better/more recent versions of Tor, obfsproxy, torsocks, etc.
Negligible for Template:Project name installations from repository: Not essential, but probably better not neglected.
Convertible into postinst script: If you have any ideas? Running "apt-get update" to include TPO's repository while from within a maintainer script apt-get/dpkg is already running is not possible.
Details: Upgrading Tor on Anonymity Distributions from The Tor Project's APT repository, because that sometimes contains better/more recent versions of Tor.
Negligible for Template:Project name installations from repository: Not essential, but probably better not neglected.
Convertible into postinst script: If you have any ideas? Requires that the #anon-shared-build-apt-sources-tpo chroot-script has been already applied. Running "apt-get install" from a maintainer script while dpkg/apt-get is running is impossible.
Details: Upgrading torsocks on Anonymity Distributions from The Tor Projects repository because that sometimes contains better/more recent versions of torsocks (which is required for Stream Isolation and by uwt.
Convertible into postinst script: Probably not? For this script to have a chance of being effective, it must run after installation of all packages is done.
Short description: installs Tor Browser during build
Details: Installs Tor Browser in Anonymity Linux Distributions during build using tb-updater. (Only interesting for own custom builds that are not supposed to be redistributed.)
Convertible into postinst script: Not required, because not used by default in Template:Project name build script and because for legal reasons it is best if users download TBB themselves.
VBoxManage modifyvm "[[:Template:Gateway product name short]]" --natpf1 "9000",tcp,127.0.0.1,9000,,9000
3. Modify Whonix-Gateway User Firewall Settings.
Note: If no changes have yet been made to Whonix Firewall Settings, then the Whonix User Firewall Settings File /usr/local/etc/whonix_firewall.d/50_user.conf appears empty (because it does not exist). This is expected.
Select your platform.
Graphical Whonix-Gateway
Start Menu → Applications → Settings → User Firewall Settings
Terminal Whonix-Gateway
In Whonix-Gateway, open the whonix_firewall configuration file in an editor.
Qubes App Launcher (blue/grey "Q") → Whonix-Gateway App Qube (commonly called sys-whonix) → User Firewall Settings
For more help, press on Expand on the right.
Note: This is for informational purposes only! Do not edit /etc/whonix_firewall.d/30_whonix_gateway_default.conf.
Note: The Whonix Global Firewall Settings File /etc/whonix_firewall.d/30_whonix_gateway_default.conf contains default settings and explanatory comments about their purpose. By default, the file is opened read-only and is not meant to be directly edited. Below, it is recommended to open the file without root rights. The file contains an explanatory comment on how to change firewall settings.
## Please use "/etc/whonix_firewall.d/50_user.conf" for your custom configuration,
## which will override the defaults found here. When {{project_name_short}} is updated, this
## file may be overwritten.
UseBridges 1
# The address and port are ignored by the client transport plugin.
Bridge flashproxy 0.0.1.0:1 4D6C0DF6DEC9398A4DEF07084F3CD395A96DD2AD
Bridge flashproxy 0.0.1.0:2 4D6C0DF6DEC9398A4DEF07084F3CD395A96DD2AD
Bridge flashproxy 0.0.1.0:3 4D6C0DF6DEC9398A4DEF07084F3CD395A96DD2AD
Bridge flashproxy 0.0.1.0:4 4D6C0DF6DEC9398A4DEF07084F3CD395A96DD2AD
Bridge flashproxy 0.0.1.0:5 4D6C0DF6DEC9398A4DEF07084F3CD395A96DD2AD
# Change the second number here (9000) to the number of a port that can
# receive connections from the Internet (the port for which you
# configured port forwarding).
ClientTransportPlugin flashproxy exec /usr/bin/flashproxy-client --register :0 :9000
10. Save.
11. Reload Tor.
After changing Tor configuration, Tor must be reloaded for changes to take effect.
Note: If Tor does not connect after completing all these steps, then a user mistake is the most likely explanation. Recheck /usr/local/etc/torrc.d/50_user.conf and repeat the steps outlined in the sections above. If Tor then connects successfully, all the necessary changes have been made.
If you are using Qubes-Whonix™, complete the following steps.
Qubes App Launcher (blue/grey "Q") → Service → Whonix-Gateway™ ProxyVM (commonly named 'sys-whonix') → Reload Tor
If you are using a graphical Whonix-Gateway, complete the following steps.
Start Menu → System Tools → Reload Tor
If you are using a terminal Whonix-Gateway, click
HERE for instructions.
Complete the following steps.
Reload Tor.
sudo systemctl reload tor@default.service
Check Tor's daemon status.
sudo systemctl status tor@default.service
It should include a a message saying.
Active: active (running) since ...
In case of issues, try the following debugging steps.
On tor-talk we've been told "You shouldn't prioritise ScrambleSuit because it is superseded by obfs4", and there are now pressing plans in the Tor Project to deprecate obfs2 and obfs3 in favour of obfs4. Hence rejecting this ticket, and focusing on #7980 [obfs4 support] instead.
Example of using obfs3 bridges:
You cannot use the example bridge 141.201.27.48:420 below, because it is only an example. You still need to find your own bridges as explained in the section above, titled Finding a bridge and choosing the right protocol.
You cannot use the example bridge 141.201.27.48:420 below, because it is only an example. You still need to find your own bridges as explained in the section above, titled Finding a bridge and choosing the right protocol.
UseBridges 1
ClientTransportPlugin obfs4 exec /usr/bin/obfs4proxy managed
bridge obfs4 161.217.177.95:10703 B3B8009D01BB7E5FDFAEC cert=4RaIqGiOytEXm6Hw iat-mode=0
4. Optional - prepend the Exec= line with "firejail"
Exec=firejail /usr/lib/firefox-esr/firefox-esr %u
Note: Instead of launching sand-boxed applications from the terminal, both Template:Project name and [[Qubes-Whonix|Template:Q project name]] users can edit the relevant .desktop file that launches a process and prepend the executable path with the firejail command. This process can be repeated with every .desktop application file if desired.[178]
Note: If no changes have yet been made to Whonix Firewall Settings, then the Whonix User Firewall Settings File /etc/whonix_firewall.d/50_user.conf appears empty (because it does not exist). This is expected.
Ensure the VM has sudo access first. If PERSISTENT Mode | SYSMAINT Session is available in some form, you must boot into this mode before these steps will work.
Platform specific. Select your platform.
Graphical Whonix-Workstation USER Session
Start Menu → System Tools → User Firewall Settings
Graphical Whonix-Workstation SYSMAINT Session
System Maintenance Panel → Open Terminal → run /usr/libexec/whonix-firewall/firewall50user
Note: This is for informational purposes only! Do not edit /etc/whonix_firewall.d/30_whonix_workstation_default.conf.
The Whonix Global Firewall Settings File /etc/whonix_firewall.d/30_whonix_workstation_default.conf contains default settings and explanatory comments about their purpose. By default, the file is opened read-only and is not meant to be directly edited. Below, it is recommended to open the file without root rights. The file contains an explanatory comment on how to change firewall settings.
## Please use "/etc/whonix_firewall.d/50_user.conf" for your custom configuration,
## which will override the defaults found here. When {{project_name_short}} is updated, this
## file may be overwritten.
If using a graphical Whonix-Workstation, complete these steps.
Start Menu → System Tools → Global Firewall Settings
If using a terminal Whonix-Workstation, complete these steps.
In Whonix-Workstation, view the global firewall configuration file in an editor.
nano /etc/whonix_firewall.d/30_whonix_workstation_default.conf
Add.
EXTERNAL_OPEN_PORTS+=" $(seq 17600 17659) "
Save.
Reload Whonix-Workstation Firewall.
Ensure the VM has sudo access first. If PERSISTENT Mode | SYSMAINT Session is available in some form, and you are not booted into it, reboot the VM to reload the firewall.
Platform-specific. Select your platform.
Graphical Whonix-Workstation USER Session
Start Menu → System Tools → Reload Firewall
Graphical Whonix-Workstation SYSMAINT Session
System Maintenance Panel → Open Terminal → run sudo whonix_firewall
Hardware clock: Set to UTC. OpenSSL (used by Tor) leaks it, but that is of no concern. Tor is running on Linux and Linux is expected to be run in UTC. Therefore there is no point to set it to the local time zone of the user.
An adversary could guess if someone is running an onion service with constant clock adjustments, that it is hosted inside a Template:Workstation product name. It is unknown if the clock adjustments by sdwdate are big enough to enable an adversary to guess that.
TODO: Open question... "ntpd adjusts the clock in small steps so that the timescale is effectively continuous and without discontinuities" - is that possible with a sdwdate like approach as well? -> Working on sclockadj.
Running sdwdate also every [ 1440 minutes + random(0-1440) ]. Not running this every hour at a random time, because Tor does not like clock jumps. [deprecated because sclockadj] When testing this, there were cases where the clock jumped about 800 seconds, which caused Tor to expire circuits, which caused connection interrupts.
TODO: Open question... How often should sdwdate run on Template:Gateway product name? Every hour is a bad idea, as we see above. Not running it again when some people may run Template:Gateway product name for days or weeks is not good either, since the clock can drift. Maybe it should run wait 24 hours and then wait a random amount of minutes within 24 hours? -> Will be solved when sclockadj gets finished.
The entry guard or bridge can see the time through TCP timestamp.
Continuous clock jumps could help the entry guard or bridge guessing, that a Template:Gateway product name is connected.
TODO: Open question... "ntpd adjusts the clock in small steps so that the timescale is effectively continuous and without discontinuities" - is that possible with a sdwdate like approach as well? -> Will be solved when sclockadj gets finished.
sdwdate is designed to be as secure as TLS (RFC 2246) but of course the security of TLS is often reduced to whichever CA racket you believe is trustworthy. By default, sdwdate uses curl that by default trusts your local CA root store - so when any of these companies assist in a MITM attack, malicious time information could be feed into your system.
This was a difficult development path decision. Many people, including Patrick Schleizer, didn't like the old Openbox interface in TorBOX (deprecated project name) 0.1.3 because it was too inconvenient, non-intuitive, uncommon, difficult, etc. There is no rational unarguable choice for the best desktop.
MATE has not been chosen, because there are no packages in Debian repositories. GNOME2 is deprecated and only a fraction of GNOME2 users like GNOME3. Other desktops (LXDE, XFCE, Openbox) are less widespread, not so pretty, and in some opinions harder to use (even difficult to create a desktop shortcut), thus not attracting many users.
Choosing KDE is a personal preference by Template:Project name developer Patrick Schleizer. KDE has one advantage, the only developer likes it and remains interested to maintain and develop Template:Project name further.
You are free to uninstall KDE and install any other desktop environment of your own choice.
This is a non-ideal situation. Inspired by select your webbrowser, it would be ideal if Template:Project name would offer to choose which desktop to install but unfortunately, such a wizard does not exist yet. There are no development resources to implement such a solution. Help is welcome.
If there were contributors, we could maybe also include other desktop environments by default or offer alternative Template:Project name builds with different default desktop environments or ideally implement a "choose your desktop" option after first boot of Template:Project name.
Please also read [[#Why are the Template:Project name images so big?]] above, the same applies here.
The sandboxed Tor Browser is currently only available for 64-bit Linux users.
Testers only! There are unresolved issues which affect fingerprinting and security, and as of June 2018, a decision has been made to abandon the project. [184]
#Tor Browser Hardened
The "hardened" Tor Browser has been deprecated and major features like Selfrando memory randomization are now part of the alpha series and planned for eventual mainline adoption. Consequently, The Tor Project recommends users seeking a higher security solution should default to the sandboxed Tor Browser: [185][186]
While the Sandboxed Tor Browser is currently in an experimental state itself, we feel that it provides much better safeguards against exploitation than the features we shipped in the hardened series.
A sandbox is a secure environment for running Tor Browser which mitigates exploit vectors which would otherwise deanonymize the user or infect their computer. For instance, sandboxing reduces the opportunities for an attacker to easily identify real IP and MAC addresses, install malware, or browse user files.[187] In simple terms, Tor Browser runs in a limited awareness container that is prevented from interacting with the rest of the user's computer. The spate of recent attacks on Tor Browser in the wild suggest this is a sensible approach for cautious users or those facing significant risks.
The Tor Browser sandbox is compatible with either the stable or alpha Tor Browser series, but it is incompatible with grsec kernels. [188]
Sandboxing Effects on Tor Browser Functionality
Sandboxing improves security, but some functionality is lost inadvertently or by design. Also, some functions like sound must be optionally configured. In early 2018, broken items include: [189]
The Tor Browser sandbox is unlikely to ever support:
The FTE pluggable transport.
Hardware-accelerated 3D rendering due to the inherent hardware access risks.
Printing, except to a file - this removes any risky network interface in the container.
Connections outside of the Tor network.
Compatibility of Tor Browser with a grsec kernel (due to ASAN/Pax conflicts).
Installing or updating of add-ons - extensions are exposed as read-only files to Tor Browser running in a container.
Manual configuration changes are required for audio support and the Tor circuit display (already disabled in Template:Project name). Users are not recommended to enable sound, as this opens up potential attack vectors for advanced adversaries to read files from the filesystem.
Users are unable to install additional add-ons that are not bundled by default with Tor Browser. By design, fonts are limited to a minimal set that are bundled with Tor Browser, and plug-ins like Flash or Silverlight will not work.
The Adwaita Gtk+-2.0 theme is not installed by default - advanced users can choose to optionally install it at this step as follows: sudo apt-get install gnome-themes-standard[191]
Download Tor Browser Sandbox
1. Download the Sandbox Binary and Key File
For later releases, the Tor Project sandbox binaries and key files can be found here.
The output should show a good signature from the Tor developers and be similar to this.
gpg: Signature made Tue 24 Jan 2015 09:29:09 AM CET using RSA key ID D40814E0
gpg: Good signature from "Tor Browser Developers (signing key) "
gpg: WARNING: This key is not certified with a trusted signature!
gpg: There is no indication that the signature belongs to the owner.
Primary key fingerprint: EF6E 286D DA85 EA2A 4BA7  DE68 4E2C 6E87 9329 8290
If a bad signature warning is received, delete the files, rotate the Tor circuits, and download them again.
3. Unzip the Sandbox
In the terminal, run.
unzip sandbox-0.0.16-linux64.zip
Launch Sandboxed Tor Browser
To start the sandbox, open a terminal and run.
cd sandbox
./sandboxed-tor-browser
When prompted, select the preferred Tor Browser version to use in Template:Workstation product name. Both the stable and alpha Tor Browser releases have been tested to work in Template:Project name 14. To check the sandboxed-tor-browser is correctly using the system Tor process run.
Only the testers version of Template:Project name requires manual downloading of templates with qubes-dom0-update, [192] which downloads Template:Project name from Qubes' dom0 templates-community-testing repository. Users who wish to reinstall the templates should add --action=reinstall.
Copy and paste the IP addresses to the very bottom of /usr/local/etc/torrc.d/50_user.conf, after the ClientTransportPlugin entries. Users must ensure "bridge" appears at the beginning of each line.
In the obfs3 and obfs4 examples below:
Do not copy and paste this list of bridge entries to the torrc file. They will not work.
After /usr/local/etc/torrc.d/50_user.conf editing is finished, save and exit.
<Ctrl-X> --> press Y --> <Enter>
The sample text for a complete obfs4 torrc file is below. Check your file is similar, except for the specific bridge entries.
# This file is part of Whonix
# Copyright (C) 2012 - 2013 adrelanos
p# See the file COPYING for copying conditions.

# Use this file for your user customizations.
# Please see /usr/local/etc/torrc.d/50_user.conf.examples for help, options, comments etc.

# Anything here will override {{project name}} own Tor config customizations in /usr/share/tor/tor-service-defaults-torrc

# Enable Tor through setup-dist or manually uncomment "DisableNetwork 0" by
# removing the # in front of it.
DisableNetwork 0
UseBridges 1
ClientTransportPlugin obfs2,obfs3,obfs4 exec /usr/bin/obfs4proxy

bridge obfs4 192.235.207.85:42086 0EEB10BF4B4FAF56D46E cert=oue8sYYw5wi4n3mf2WDOg iat-mode=0
bridge obfs4 34.218.26.20:43263 DD21A551767816A0C9495 cert=7qzS6KASquPvJU82Fm7qoJw iat-mode=0
bridge obfs4 161.217.177.95:10703 B3B8009D01BB7E5FDFAEC cert=4RaIqGiOytEXm6Hw iat-mode=0
Step 3: Enable Tor
Follow this procedure if it has not been previously completed.
Enable Tor using Anon Connection Wizard (easiest option).
Start Anon Connection Wizard.
If you are using Qubes-Whonix™, complete the following steps.
Step 4: Have /usr/local/etc/torrc.d/50_user.conf Changes Take Effect
Reload Tor.
After changing Tor configuration, Tor must be reloaded for changes to take effect.
Note: If Tor does not connect after completing all these steps, then a user mistake is the most likely explanation. Recheck /usr/local/etc/torrc.d/50_user.conf and repeat the steps outlined in the sections above. If Tor then connects successfully, all the necessary changes have been made.
If you are using Qubes-Whonix™, complete the following steps.
Qubes App Launcher (blue/grey "Q") → Service → Whonix-Gateway™ ProxyVM (commonly named 'sys-whonix') → Reload Tor
If you are using a graphical Whonix-Gateway, complete the following steps.
Start Menu → System Tools → Reload Tor
If you are using a terminal Whonix-Gateway, click
HERE for instructions.
Complete the following steps.
Reload Tor.
sudo systemctl reload tor@default.service
Check Tor's daemon status.
sudo systemctl status tor@default.service
It should include a a message saying.
Active: active (running) since ...
In case of issues, try the following debugging steps.
ERROR: Systemd Clock Check Result:
Unexpected results by timedatectl.
timedatectl_output_pretty:
Local time: Fri 2018-01-12 14:04:59 UTC
Universal time: Fri 2018-01-12 14:04:59 UTC
RTC time: Fri 2018-01-12 14:04:06
Time zone: Etc/UTC (UTC, +0000)
NTP enabled: yes
NTP synchronized: no
RTC in local TZ: no
DST active: n/a
It is generally recommended to keep the default as per {{project name}} Design. [1] If you did not change timezone related settings, please report this {{project name}} bug. If you know what you are doing and changed this on purpose, feel free to disable this check. [2]

[1] https://www.whonix.org/wiki/Dev/Design-Shared#timezone
[2] Create a file /etc/systemcheck.d/50_user and add:
whonixcheck_skip_functions+=" check_systemd_clock "
Although NTP is enabled, it is inactive (dead) and does not pose any threat to anonymity. This problem has been rectified in the Template:Project name 14 release.
Some users may wonder why Template:Project name does not maintain a warrant canary to warn the community of the potential existence of a secret subpoena [196] like a number of other high-profile organizations, including Qubes OS. This decision has been taken for several reasons.
Firstly, a warrant canary is an imperfect mechanism since it does not provide definitive information. As Canary Watch notes: [197]
Yet, in our time working with Canary Watch we have seen many canaries go away and come back, fail to be updated, or disappear altogether along with the website that was hosting it. Until the gag orders accompanying national security requests are struck down as unconstitutional, there is no way to know for certain whether a canary change is a true indicator. Instead the reader is forced to rely on speculation and circumstantial evidence to decide what the meaning of a missing or changed canary is.
The implication is that if the Template:Project name team forgot to update the canary for innocuous reasons, this would cause a false alarm and lead to undue anxiety in the community. Similar effects could be expected if the wording changed slightly, if the canary changed location, or if it disappeared entirely before reemerging.
Another reason a warrant canary has not been introduced relates to free speech. Worried users argue that a National Security Letter (NSL) or similar authority might lead to:
Vulnerabilities being forcibly introduced into code or during package upgrades.
These possibilities have been discussed in the following Template:Project name Forum Thread. In general, it appears that since code has been legally established as speech, and free speech cannot be hindered, there is no legal basis to compel backdoors in either the source code or binary versions.
Finally, there is serious doubt about the actual effectiveness of any legal order that might be served on the Template:Project name project. For instance, a NSL seeking "relevant information" related to national security investigations would yield little information because most visitors to the forums or wiki are using Tor already, and neither software is configured to log anything about these visits. In the case of hypothetical, malicious changes to source code, the existence of the code in the public domain already provides some protection against this threat, since it would likely be detectable.
Hosting a Whonix Mirror
The rest of this page is OUTDATED.
Please ignore this for now.
(Kept for historic purposes.)
Requirements
Running a Template:Project name mirror can be immensely helpful, but it also takes some knowledge, proper configuration and adequate resources to be truly useful. The following are necessary:
A server with a publicly accessible IP address. You might already have one of these, but lowendbox often has decent boxes at low prices. Look for those with higher bandwidth caps, as you will be serving a lot of data (~2 GB for a download of Workstation+Gateway for Template:Project name 14). The load on your individual mirror will decrease as more mirrors are added. If you exceed the allocated bandwidth, then depending on the provider, additional charges may be incurred or the service could even be terminated; be careful and overestimate bandwidth requirements.
SSH root access to that server (sudo is fine).
Recommended: Debian trixie as the operating system. Other distributions are possible, but this guide is written using stretch.
This will create the directory structure where we will put our mirrored copy of Template:Project name, as well as install Apache in order to serve the mirrored content.
This will put the contents of http://rsync.whonix.org/ in your server's directory /var/www/whonix
Automating Updates from Master
To ensure your mirror is up-to-date whenever a new version of Template:Project name is released, add an entry to the crontab to check for updates every hour.
sudo crontab -e
In Debian stretch, crontab will be visible (open) in nano. Hit "Page Down" or the down cursor key until you are on the last line (below "m h dom mon dow command") and enter:
The numbers do not have to line up exactly with the heading, but this makes it easier to read.
Serving the Mirror Content
Paste the following text into /etc/apache2/sites-available/download.whonix.org.conf#
# download.whonix.org (/etc/apache2/sites-available/download.whonix.org.conf)
#
<VirtualHost *:80>
ServerAdmin <YourContactEmail>EDIT THIS
ServerName download.whonix.org
DocumentRoot /var/www/whonix/
# Logfile
ErrorLog /var/log/apache2/whonix/error.log
</VirtualHost>
After entering your contact email (it will throw errors otherwise), enable the site.
sudo a2ensite download.whonix.org.conf
A prompt will appear to reload apache.
sudo service apache2 reload
Stripping User IPs
While the config file above does not have an access log, user IPs can still be logged in error.log It is therefore recommended to install mod-removeip to make Apache "blind" to the IP addresses of users.
Install mod-removeip.
sudo apt-get install libapache2-mod-removeip
Activate it.
sudo a2enmod removeip
Reload Apache.
sudo service apache2 restart
Test the Mirror
Replace 109.230.212.54 below with the IP of your server.
Email the IP address of your new mirror to Patrick Schleizer, and you will be notified when it has been added to the rotation. Due to the way DNS propagates, it may take up to 24 hours before your system starts seeing traffic.
Thank you for your support!
Optional Customization
It is possible to customize the header and footer of your directory listing as explained here. Feel free to have something like "Mirror provided by <link to your blog or company>", but please do not go overboard. Mirrors with blatant banner ads or user-tracking scripts will be rejected.
Offline Documentation - PDFBook
The instructions below to create a Template:Project name Wiki PDF are currently non-functional.
At the time of writing, a 16.6MB file is created. The result is readable but needs some cleanup. Translated pages are included, but will sometimes present with broken, nonsensical characters. The links are absolute and not relative, meaning users are redirected to the online site instead of internal chapters in the file. To avoid this, use the search function instead.
Enable sdwdate-gui
Non-Qubes-Whonix
By default, sdwdate-gui automatically starts when Template:Project name is booted. This keeps users informed about the status of the Tor network connection and sdwdate's progress, and also helps to test this feature.
If users are willing to persist with one sdwdate-gui systray instance per VM, then it is recommended to enable sdwdate-gui autostart. This setting keeps users informed about the status of the Tor network connection and sdwdate's progress, and will help to test this feature.
1. Configure sdwdate-gui autostart.
Open file /usr/lib/sdwdate-gui/start-maybe in an editor with administrative ("root") rights.
1 Select your platform.
Non-Qubes-Whonix
2 Notes.
Sudoedit guidance: See Open File with Root Rights for details on why using sudoedit improves security and how to use it.
Editor requirement: Close Featherpad (or the chosen text editor) before running the sudoedit command.
3 Open the file with root rights.
sudoedit /usr/lib/sdwdate-gui/start-maybe
Qubes-Whonix
2 Notes.
Sudoedit guidance: See Open File with Root Rights for details on why using sudoedit improves security and how to use it.
Editor requirement: Close Featherpad (or the chosen text editor) before running the sudoedit command.
Template requirement: When using Qubes-Whonix, this must be done inside the Template.
3 Open the file with root rights.
sudoedit /usr/lib/sdwdate-gui/start-maybe
4 Notes.
Shut down Template: After applying this change, shut down the Template.
Restart App Qubes: All App Qubes based on the Template need to be restarted if they were already running.
Example only: This is just an example. Other tools could achieve the same goal.
Troubleshooting and alternatives: If this example does not work for you, or if you are not using Whonix, please refer to Open File with Root Rights.
3 Open the file with root rights.
sudoedit /usr/lib/sdwdate-gui/start-maybe
2. Replace its contents with the following code.
#!/bin/bash

## This file is part of {{project_name}}.
## Copyright (C) 2012 - 2014 Patrick Schleizer <adrelanos@whonix.org>
## See the file COPYING for copying conditions.

set -e

if [ -d /usr/lib/qubes ]; then
    VM_TYPE="$(/usr/bin/qubesdb-read /qubes-vm-type)"

    if [ "$VM_TYPE" == "AppVM" ]; then
        /usr/lib/sdwdate-gui/sdwdate-watcher
    elif [ "$VM_TYPE"  == "ProxyVM" ]; then
        sdwdate-gui-qubes
    fi

else
    sdwdate-gui
fi
3. Save and exit.
Developers are designing the next sdwdate-gui version so it can be conveniently enabled. Check back later for further information concerning sdwdate-gui modifications to prevent auto-start.
Ledger Live Digital Signature Verification
It is also weird, highly unusual [202] and a red flag, that ledger digital software signatures are on a separate domain name https://ledger-live-tools.now.sh. The domain name is ledger-live-tools.now.sh. Using a .sh top level domain. Looks fishy at first sight. However, the domain name is apparently legit. There are several authoritative sources indicating its legitimacy.
Tox [203][204] looks like a promising solution for secure, encrypted communications. The official client implementation is based on the TokTok protocol library, which is very feature-rich and has a variety of functions besides VoIP. By default, Tox does not attempt to cloak your IP address from authorized contacts. However, Tox is the only Tor compatible VoIP solution we know of, allowing communication with others even if they are not anonymous. [205] Desktop versions are available for every major OS, however mobile support is lacking. [206]
In the Tox design, your public key is your Tox ID, which is looked up in the DHT network. Users can optionally create a vanity address using a DNS directory that maps ID hashes to human usable addresses (though no strong guarantees against spoofing are possible). Users can message friends, join public/private chat rooms and send each other large files. Everything is encrypted using the NaCl crypto library, via libsodium. [207][208] Tox helps to protect user privacy by: [209]
Removing the need to rely on central authorities to provide messenger services
Enforcing end-to-end encryption with perfect forward secrecy as the default and only mode of operation for all messages
Making your identity impossible to forge without the possession of your personal private key, which never leaves your computer
Additional features can be implemented by any client, so long as they are supported by the core protocol. Features that are not related to the core networking system are left up to the client. [211]
Start qTox
qTox is installed by default in Whonix-Workstation™. [212]
There is no proof beyond reasonable doubt that this key has been or could be used for malicious purposes. Microsoft forgot to strip symbol names. Why would anyone add key named NSAKEY anywhere? To debunk this reasonable suspicion, the source code could have been released. It could then be recompiled and either have a deterministic result or the difference should be minimal. There might not be enough evidence to proof NSAKEY key specifically was used or could be used to spy on users but there is enough evidence for reasonable suspicious. Due to this uncertainty, is worth mention. Microsoft always had and still has the ability to debunk this suspicious by releasing the related source code with instructions how to compile it so it's similar to the suspicious original file. Instead Microsoft published this denial statement Template:Link (web archived, live link broken).
By comparison, the Linux kernel source code also contains textual strings such as NSA. Examples include NSA_DEV, pass_NSA, RX_ENABLE_NSA, nsa_mode. However, no serious accusations of collaboration with NSA have been made. These the purpose of textual strings are in the open, where not bound through debug symbols which where forgotten to be removed, and can be reviewed by any member of the public with the required skills.
Microsoft Windows: forgotten debug symbol in compiled file (binary)
It is difficult to keep users updated with system status information when they are using a terminal instead of a graphical desktop environment. Therefore, whonixcheck will very occasionally provide status messages, even if the user is logged into the terminal tty1 and sees a command prompt.
This feature can be useful, for example if Template:Gateway product name has a customized configuration (even if it was not strictly required) and successful status messages are posted about the system. On the other hand, status message output can be a hindrance, particularly if the user is doing something like editing a configuration file when it appears. If it is necessary to complete activities without interruption, it is recommended to log into a tty other than tty1, for example tty2:
Default-Download-Version: utilize the VirtualBox Host Key method: Right Ctrl + F2. [214]
Physical isolation: utilize the standard Debian feature which comes with Debian: Ctrl + Alt + F2.
Error changed its 'Suite' value from 'testing' to 'stable'
If you see the following error message.
E: Repository 'tor+https://cdn-aws.deb.debian.org/debian-security buster/updates InRelease' changed its 'Suite' value from 'testing' to 'stable'
First consider completing the sanity tests described above; the system is checked for obvious and grave issues that must be fixed before attempting an upgrade. For example, if the package manager is broken due to the mixing of packages from both Debian stable and Debian testing, then the upgrade may fail part way through, leaving the system in an unstable state that is difficult to resolve.
Consider retaining the full terminal log. Even if the upgrade appears successful, there might be issues following reboot. To properly report a bug in the Template:Project name forums it is necessary to share the upgrade log so the issue can be investigated.
To perform a distribution upgrade, it is recommended to run the following command which uses apt-get-noninteractive; see the footnotes for technical reasons. [217][218][219]
Note: It is possible t and likely hat the following [[Whonix Debian Packages|Template:Project name meta packages]] are already installed, but these steps are necessary to confirm it.
Non-Qubes-Whonix
In Template:Gateway product name, install package non-qubes-whonix-gateway-xfce. apt-get install non-qubes-whonix-gateway-xfce
In Template:Workstation product name, install package non-qubes-whonix-workstation-xfce. apt-get install non-qubes-whonix-workstation-xfce
Qubes-Whonix
In Template:Gateway product name (whonix-gw-15), install package qubes-whonix-gateway. apt-get install qubes-whonix-gateway
In Template:Workstation product name (whonix-ws-15), install package qubes-whonix-workstation. apt-get install qubes-whonix-workstation
As explained in step Distribution Upgrade, all system configuration files in /etc were reset to the distributor default. If modifications were previously made to any files in folder /etc/apt/sources.list.d, they should be re-added at this step (if desired).
Review all files in folder /etc/apt/sources.list.d
We believe security software like Whonix needs to remain Open Source and independent. Would you help sustain and grow the project? Learn more about our 14 year success story and maybe DONATE!
↑For example, if a theoretical IP address leak was discovered in Template:Project name, or exit nodes were discovered to be actively exploiting apt-get traffic, then this avenue would briefly inform users about the danger.
↑The YaCy homepage states that OpenJDK8 is required for Linux, while the install instructions point to OpenJDK7. If problems are experienced, then try installing OpenJDK8 which is available as an experimental package.
↑VMDK is the standard for ova images (exported virtual appliances).
↑Search the file whonix_createvm for *VMNAME="Template:Workstation product name short"* and *VMSIZE="50G"*. Increase *VMSIZE="50G"* for example to *VMSIZE="100G"*.
↑ SecBrowser Panopticlick test stated "Yes! You have strong protection against Web tracking, though your software isn’t checking for Do Not Track policies"
↑The git installation will not persist in [[Qubes-Whonix|Template:Q project name]] following reboot. This method avoids polluting the Template:Whonix-ws TemplateVM upon which it is based.
↑The OnionShare core developer is Micah Lee. The key ID has been taken directly from www.micahflee.com
The code handling HTTP redirects in the HTTP transport method doesn't properly sanitize fields transmitted over the wire. This vulnerability could be used by an attacker located as a man-in-the-middle between APT and a mirror to inject malicous content in the HTTP connection. This content could then be recognized as a valid package by APT and used later for code execution with root privileges on the target machine.
Redirects might also be used by onion mirrors. The Template:Project name project is unaware of any Debian announcement regarding where their onion sources are hosted. Since onion sources are also just a mirror, and mirrors may also be in a position to attempt a man-in-the-middle attack, these instructions are recommended in all cases.
↑This is because Template:Project name uses /etc/apt/sources.list.d/debian.list, while Debian and Qubes' Debian templates depend upon /etc/apt/debian.list.
↑
This avoids some torsocks warnings due to the torsocks upgrade.
↑Cite error: Invalid <ref> tag; no text was provided for refs named poweroff
↑
For your convenience, the shared-folder-help package applied the following steps for you automatically.
a) shared-folder-help.postinst did:
sudo mkdir -p /mnt/sharedsudo chmod 777 /mnt/shared
b) Mounting of the shared folder is done automatically by the mnt-shared-vbox systemd service.
↑ 52.052.1Most "plugins over Tor" users probably use Mozilla Firefox and Flash on Microsoft Windows with a socksifier. They can be easily browser fingerprinted and probably even linked, see TorifyHOWTO/WebBrowsers and Tor Button FAQ.
↑ 53.053.1That is because very few people use Tor Browser with plugins, which are routed through Tor. Also because Tor Browser was at Template:Project name build time manually configured to use a Tor's SocksPort (for stream isolation), while user-installed plugins will will be automatically routed Tor's TransPort. The SocksPort and the TransPort will go through different circuits and most times through different exit relays. That probably differs from the rest of the "Plugins over Tor" users group. For demonstration, see screenshot: Flash Leak Test SocksPort and TransPort you'll see, that the Tor Browser and Flash have different Tor exit IP's. It is questionable if that particular difference could and should be fixed and if situation had improved afterwards. Cite error: Invalid <ref> tag; name "five" defined multiple times with different content
↑ 54.054.1See Change/Remove Proxy Settings for how to route Tor Browser through Tor's TransPort. Then both, Tor Browser and plugins would go through Tor's TransPort. This has been tested, see screenshot . The question would be, if that would actually improve the situation talked about in earlier footnotes. There are probably only a very few using Tor Browser and plugins through the same circuit. (In a earlier footnote, it was mentioned, that they are still using Mozilla Firefox, even though that's even more discouraged.)
↑Note that Tor Button in Tor Browser disables all plugins by the default settings. That decision is made by the Tor Browser developers, not by the Template:Project name developers. (Of course, the Template:Project name developers second their decision.)
↑Some users report xpinstall.signatures.required needs to be disabled in Tor Browser about:config settings to enable FoxyProxy, when it is installed from the Debian repository. This workaround is not required when installing FoxyProxy from addons.mozilla.org. https://forums.whonix.org/t/new-version-of-tbb-no-longer-accepts-foxyproxy-plugin
↑
Don't get fooled by ls or usual GUI file managers. We're using sparse files. When you are using a reasonable modern file system - which you most likely do - it won't use up a lot space. You can check this for yourself.
du -h --apparent-size {{gateway_product_name}}-8.2.qcow2
101G    {{gateway_product_name}}-8.2.qcow2
du -h {{gateway_product_name}}-8.2.qcow2
2.6G    {{gateway_product_name}}-8.2.qcow2
This is tested. If you don't have 500 GB free space, you can have 10 copies if Template:Gateway product name-8.2.qcow2.
↑For example WHONIX_BUILD_NEW_CHANGELOG_VERSION: 2:6.13.g4218c564e556cb68a3f18dc4040db5353690706c does not look sane, but WHONIX_BUILD_NEW_CHANGELOG_VERSION: 2:6-debpackage1 looks sane.
↑Torrent clients known to work: transmission, Vuze, Deluge. Check this clients table. If nobody is seeding at the time, only clients with the "as" feature can be used, because we are providing a webseed.
↑ 134.0134.1134.2134.3It is at least as secure as SSL and SHA-1, better than plain http. This is because you get the torrent file or magnet link over https and the torrent/magnet client checks the SHA-1 checksum at the end. Using OpenPGP verification would be safer.
↑Magnet link clients known to work: gtk-gnutella. Check this clients table. If nobody is seeding at the time, only clients with the "as" feature can be used, because we are providing a webseed.
↑When you build from source code, audit the source code for being non-malicious and reasonably bug free, you do not have to Trust the developers, the website or the SSL certificate authorities.
↑changelog.gz copyright README.Debian control control.tar.gz data.tar.gz debian-binary md5sums
↑Torrent clients known to work: transmission, Vuze, Deluge. Check this clients table. If nobody is seeding at the time, only clients with the "as" feature can be used, because we are providing a webseed.
↑Magnet link clients known to work: gtk-gnutella. Check this clients table. If nobody is seeding at the time, only clients with the "as" feature can be used, because we are providing a webseed.
↑ 150.0150.1When you build from source code, audit the source code for being non-malicious and reasonably bug free, you do not have to Trust the developers, the website or the SSL certificate authorities.
↑By additional verification that you got the source code from the original authors and by ensuring you're using the same source code as others you get better security.
↑
This is because in order to implement Stream Isolation, Template:Project name apt-get uwt wrapper forces apt-get through torsocks. Unfortunately, not only apt-get is forced through Tor, but also sysvinit and subsequently all daemons sysvinit is restarting. acpi_fakekey daemon uses local connections. Those will be rejected by torsocks. The worst that can happen is that acpi_fakekey won't operate until manually restarted. This is a bigger issue for web servers and alike, because those may not function until manually restarted.
This will likely be fixed as soon Template:Project name will be based on Debian jessie, because that uses systemd, that is not affected by this as well as torsocks 2.0 may solve this.
↑So anon-ws-disable-stacked-tor environment variables changes take effect to fix the ControlPort quotes warning.
↑
If you only want Shared Folder, mouse integration, for improved security, you can try using only the next line, but not the line after next.
You need kernel headers to be able to compile the kernel module.
If you want all features, such as dynamic resolution and shared clipboard
sudo apt-get install virtualbox-guest-x11
↑
If you want to set it to no proxy, you could either:
additionally add in ~/tor-browser_en-US/start-tor-browser below "#!/bin/sh".
export TOR_TRANSPROXY=1
Or add to /etc/environment
TOR_TRANSPROXY=1
and reboot.
↑
When using the regular Tor Browser Bundle from The Tor Project without Template:Project name, that menu can be used to change network settings inside Tor. It has the same effects as editing Tor's config file torrc. Using this graphical user interface is not possible in Template:Project name, because for security reasons, in Template:Project name there is only limited access to Tor's control port. (See Dev/CPFP for more information.) (You could change such settings manually in /usr/local/etc/torrc.d/50_user.conf on Template:Gateway product name. (See also VPN/Tunnel suppprt for more information.)
↑(Recommended against!)
As a workaround you could enable IsolateDestAddr and IsolateDestPort for the Tor Browser.
This comes at great performance costs, especially for websites with lots of 3rd party content. It will not isolate connections to different websites on a shared server and it will create new circuits for every IP address you connect to (e.g. it will isolate subdomains if they use different IPs). It will also let you stand out more from other Tor Browser users, because almost no one is using it that way. Generally, for these reasons you should not enable this feature. Instead close the browser and get a "new identity" through arm on the gateway if you want to separate activities inside Tor Browser. If you want to do this anyway, follow the following instructions.
On Template:Gateway product name open /usr/local/etc/torrc.d/50_user.conf'.
↑
The Qubes templates-community-testing repository definition was introduced in 30cdd9c9 in Qubes dom0 package v3.2-2-qubes-release #582 / v4.0-4-qubes-release which is currently only available in Qubes' qubes-dom0-current-testing repository.
↑Users who wish to reinstall the templates should add --action=reinstall.
↑Users who wish to install the testers-only version should add --enablerepo=qubes-templates-community-testing.
↑
It will not be perfectly stream isolated. DNS might go through Tor's TransPort.
If this matters to you, you could theoretically... UNTESTED
Install a http to socks converter (such as polipo) listening on 127.0.0.1:8118 and forwarding to <Template:Gateway product name IP>:9102.
Apply the following setting every time you restart Thunderbird.
Thunderbird -> Enigmail (from menu bar) -> Preferences -> Display Expert Settings and Menus -> Advanced -> Additional Parameters -> replace http-proxy=http://127.0.0.1:8118 with socks5://<Template:Gateway product name IP>:9102 -> OK
↑
To improve this situation, if you are using OpenVPN and Debian's init script to automatically start it, add an insserv override to wait for openvpn being started.
1. Create a new file /etc/insserv/overrides/tor.
Open file /etc/insserv/overrides/tor in an editor with administrative ("root") rights.
1 Select your platform.
Non-Qubes-Whonix
2 Notes.
Sudoedit guidance: See Open File with Root Rights for details on why using sudoedit improves security and how to use it.
Editor requirement: Close Featherpad (or the chosen text editor) before running the sudoedit command.
3 Open the file with root rights.
sudoedit /etc/insserv/overrides/tor
Qubes-Whonix
2 Notes.
Sudoedit guidance: See Open File with Root Rights for details on why using sudoedit improves security and how to use it.
Editor requirement: Close Featherpad (or the chosen text editor) before running the sudoedit command.
Template requirement: When using Qubes-Whonix, this must be done inside the Template.
3 Open the file with root rights.
sudoedit /etc/insserv/overrides/tor
4 Notes.
Shut down Template: After applying this change, shut down the Template.
Restart App Qubes: All App Qubes based on the Template need to be restarted if they were already running.
↑
Possibly Install Packages. But would have to happen much earlier before changing Template:Project name firewall rules. (Because then Tor-only apt will no longer work.)
Update package lists.
sudo apt-get update
Install resolvconf. Since this is used by /etc/openvpn/update-resolv-conf. We probably better should not install it by default since it is not needed for Template:Project name generally but may introduce new issues.
sudo apt-get install resolvconf
Possibly /etc/openvpn/openvpn.conf changes.
up "/usr/bin/sudo script_type=up dev=tun0 /etc/openvpn/update-resolv-conf"
down "/usr/bin/sudo script_type=down dev=tun0 /etc/openvpn/update-resolv-conf"
↑Special debug builds will now be used instead of shipping ASan in regular builds. This is beneficial because ASan has a debugging, rather than a security focus, and is extremely resource intensive.
↑
Also other operating systems, Even Whonix and Kicksecure™ source code contain the string snippet nsa. For example in package security-misc file /usr/lib/security-misc/pam_tally2-info contains string xscreensaver has its own failed login counter. The word xscreensaver contains xscreensaver that however is an absurd comparison. Things have to be compared in proper context. Whonix and Kicksecure™ source code there is no variable, function or symbol name with any meaning containing "nsa". Words such as unsave have nothing to do with it. This can be confirmed by auditing the related parts of the source code.
↑
Mandatory, not optional for most users. Unless you know what you are doing.
It (initially) downloads the release-upgrade script.
In past this for example to ensure that the signing key for the next Debian release got added. Quote debian-archive-keyring changelog:
debian-archive-keyring (2019.1+deb10u1) buster; urgency=medium

  * Remove jessie's archive keys (Closes: #981343)
  * Add automatic signing keys for bullseye (Closes: #977911)
  * Update my own key
  * Add Debian Stable Release Key (11/bullseye) (ID: 600062A9605C66F00D6C9793)
    (Closes: #977910)
  * Refresh signatures over keyrings/debian-archive-keyring.gpg and keyrings/debian-archive-removed-keys.gpg
  * Add myself to uploaders
↑
This step is only required if they were previously enabled, but the command is harmless either way.
↑apt-get-noninteractive prevents the user from being asked difficult technical questions anytime during the upgrade, since the upgrade is stopped until the question is answered. apt-get-noninteractive uses apt-get with -o Dpkg::Options::=--force-confnew. This means apt-get will prefer config files shipped by the distribution in case there is an existing modified config file on the system. Old config files should be automatically moved to configfile.dpkg-old.
↑
Advanced users can use apt-get rather than apt-get-noninteractive. However, it is probably best to use apt-get-noninteractive and to re-apply custom configurations after the upgrade.
↑
Parameter --no-install-recommends prevents the installation of packages (from debian/controlRecommends: packages by Debian) which are not useful, confusing or waste disk space inside of virtual machines, such as xscreensaver. For other reasons why Template:Project name uses --no-install-recommends, see: Technical Stuff.
↑
A manual restart is required because apt-get-noninteractive is being used. This step is not crucial since it would also run after reboot.
↑In order to separately run the commands, it is necessary to remove the ; and \ characters at the end.
↑Unfortunately, as of Debian buster apt-get no longer allows a single apt-get purge command followed by a list of all packages. If one of the packages is not already installed, then it aborts the whole command and also refuses to uninstall those which are still present. Therefore, to run commands in succession the ; parameter is used, while \ allows a single long command to be split into multiple lines for better readability.
↑VM XFCE is not being used in Qubes and package Template:Project name XFCE Desktop Config is also not installed, so this step is unnecessary. If you want to apply this anyhow, it should be done in every AppVM.
↑Because GUI application whonix-repository-wizard should not be run as root.
By using our website, you acknowledge that you have read, understood and agreed to our Privacy Policy, Cookie Policy, Terms of Service, and E-Sign Consent.










 Donate
 Platform specific.
 Update the package lists and upgrade the system
 .
.
 Do not use the bundled Tor configuration for OnionShare; this would lead to a Tor-over-Tor scenario.


 or Template:Project name GitLab



 The most watertight privacy operating system in the world.


 At
Whonix we value freedom and trust, supporting Open Source and Freedom Software
At
Whonix we value freedom and trust, supporting Open Source and Freedom Software
 2012-
2026 ENCRYPTED SUPPORT LLC
2012-
2026 ENCRYPTED SUPPORT LLC



 [133]
[133]
 [135]
[135]


 , it will open both Template:Project name News Blogs in a privacy friendly way.


 and download Tor Messenger and the associated file signature (


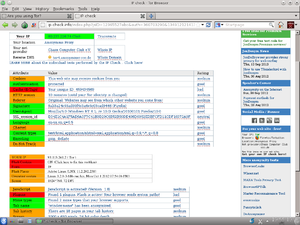
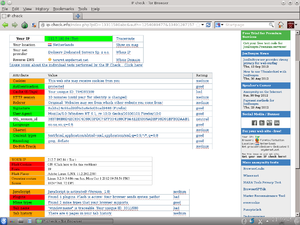
 Note: IPv6 is not yet supported by Tor. Limited workaround: OnionCat


